Tuesday, December 29, 2020

House Mouse Designs Ornament Candy

 Hi everyone!  Today I am sharing a card I made for House Mouse and Friends Monday Challenge #330 - Anything Goes with the option of Sparkle/Shine.  Anyone that has seen my cards in the past knows that that is not a problem for me!  


I started this card by die cutting a piece of Copic friendly white paper with the largest rectangle from the Wrapped Stitch Rectangles die set by Memory Box.  I then stamped the adorable Ornament Candy image featuring Monica and Mudpie and colored it with Copic markers.  This is a large and beautiful image!  After I finished coloring, I mounted my card on red glitter cardstock. 


Copic colors used for Monica:
  • Fur - T1, T3, T5
  • Skin - E50, E51
  • Ears, Nose - E93
Mudpie:
  • Fur - E21, E23, E25
  • Skin - E50, E51
  • Ears, Nose - E93
Candies:
  • RV10, RV21, RV23, RV25
  • YG01, YG05, YG07, YG09
Pine Boughs and Needles:
  • G21, G24, G29
  • E57, E59
Gold on Ornament:
  • Y11, Y15, YR21, YR23
Shadows:
  • N0, N1, N2, N3

Since Sparkle/Shine was the option for this challenge I added glitter to the candies and then used glossy accents to cover the entire ornament.  I think it really gave the ornament a more realistic look!  I then added the Tim Holtz idea-ology Naughty or Nice adornment with a bow, and a few iridescent crystals for some more sparkle and shine!  Thank you and I hope you enjoyed my card today!

Monday, December 21, 2020

Exciting News and Thank You Card!

 Hi All!  I just wanted to share some really exciting news with you.  I have been asked to join the Newton's Nook Designs Inky Paws Challenge Inspiration Team!  I am so honored and grateful for this opportunity!  I have loved playing along with the Inky Paws Challenge, and am looking forward to inspiring fellow card makers to play along as well!  

As a huge Thank You to Jen at Newton's Nook Designs, and all of the wonderful ladies that have welcomed me to the team, I have created a card just for you!

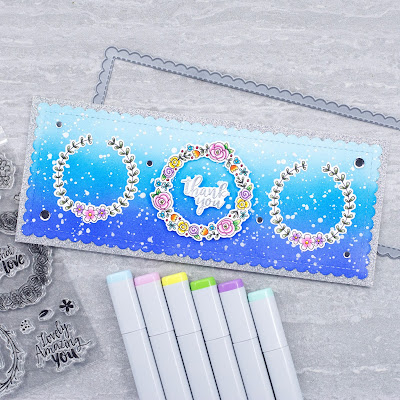
Thank You card by Amy Tollner - Happy Little Thoughts Stamp Set and Slimline Frames and Portholes Die Set by Newton's Nook Designs #newtonsnook #handmade

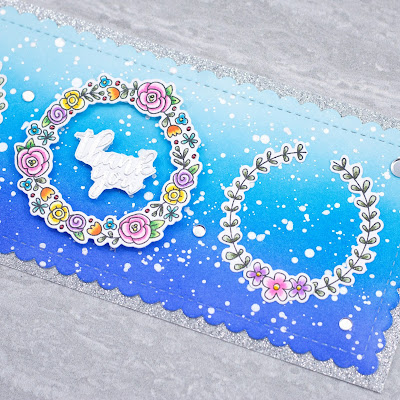
To start this card I cut a piece of silver glitter cardstock to 8.5" x 3.5".  I used the scalloped frame die from NND Slimline Frames and Portholes die set to cut smooth white cardstock on which I blended Distress Oxide Inks Tumbled Glass, Salty Ocean, and Blueprint Sketch.  It is one of my favorite blue ink blending combos!  It is so vibrant!  I then flicked some silver watercolor paint onto the ink blended panel.  

Next, I stamped the wreaths and trio of flowers from NND Happy Little Thoughts stamp set, colored them with Copic markers, and cut them out with their coordinating dies.  I glued a trio of flowers to the bottom of the two outer wreaths, and cut away the little piece of paper that attached the two sides of each wreath at the top.  I used liquid glue to adhere the two outer wreaths to the card, and popped up the center wreath with foam tape.  I silver heat embossed the sentiment, which is from NND Peony Blooms stamp set, and fussy cut it out, using foam tape to attach it to the card as well.  

Thank You card by Amy Tollner - Happy Little Thoughts Stamp Set and Slimline Frames and Portholes Die Set by Newton's Nook Designs #newtonsnook #handmade

Thank You card by Amy Tollner - Happy Little Thoughts Stamp Set and Slimline Frames and Portholes Die Set by Newton's Nook Designs #newtonsnook #handmade

Thank You card by Amy Tollner - Happy Little Thoughts Stamp Set and Slimline Frames and Portholes Die Set by Newton's Nook Designs #newtonsnook #handmade

Copic colors used for Flowers:
  • RV00, RV10, RV02, RV04
  • V000, V12, V04
  • Y00, Y02, Y08, Y17
  • Y35, Y17, YR04, YR07
  • BG11, BG23, BG15
  • B00, B02, B05
Leaves:
  • YG01, YG05, YG09
  • G21, G94, G99
Berries:
  • R27
Thank You card by Amy Tollner - Happy Little Thoughts Stamp Set and Slimline Frames and Portholes Die Set by Newton's Nook Designs #newtonsnook #handmade

For finishing touches on this card I added glitter to the leaves, glossy accents to the flower centers and berries, and few pieces of silver confetti for extra bling!  I want to say a huge Thank You again to Jen at Newton's Nook Designs for this opportunity, and to all of the wonderful ladies who welcomed me to the Inky Paws Challenge Inspiration Team! 

Thursday, December 17, 2020

Happy Pugmas

 Hi everyone!  Today I am sharing a card I created for Simon Says Stamp Wednesday Challenge - Christmas Critters.  I was lucky enough to get my hands on the Simon Says Stamp and Whimsy Stamps Stamptember collaboration, Happy Pugmas.  I just love that stamp set and was so happy to be able to use it for this challenge!


I knew exactly what I wanted this card to look like so I started by cutting a piece of red glitter cardstock to A2 size.  I then cut a piece of white cardstock to 5 1/4" x 4".  I used the second largest die in Your Next Stamp's Stitched Rectangle Frames die set to cut the red glitter frame.  

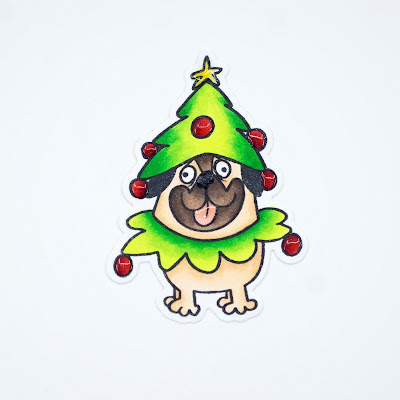
Next, I stamped the super adorable pug images, colored them with Copic markers, and cut them out with their coordinating dies.  Before adhering anything, I placed the red glitter frame and pug on the white cardstock to get placement for the sentiment.  I stamped the sentiment in black pigment ink and clear heat embossed.  I used liquid glue to adhere the white cardstock to the red glitter card base.  I then popped up the frame and pug with foam tape for some dimension!  


And on the inside:


Copic colors used for Pugs:
  • E50, E51, E53
  • E13, E15, E25, W4, W5, W6
  • Tongues - R12, E93
Red:
  • R05, R24, R46, R39
Green:
  • YG01, YG05, YG07, YG09, YG17 - just on tree
Star:
  • Y00, Y04, Y08

For finishing touches on this card I added glitter with a glitter pen, glossy accents to their cute tongues, black glaze pen to their noses, and a few red crystals for extra bling!  Thank you and I hope you enjoyed my card today!

Wednesday, December 16, 2020

Merry Woof-mas!

 Hi All!  Today I am sharing a card I made for Newton's Nook Designs Inky Paws Challenge #138 - Sketch Challenge.  The new Christmas pups are adorable and I was so happy to use them on this card!


This card is 5" x 7" and I started by cutting a piece of gold glitter cardstock to that size.  Next, I cut the green cardstock to 4 3/4" x 6 3/4" and adhered it to the glitter cardstock with liquid glue.  Next, I cut a strip of the green cardstock to 1 3/4" x 6 3/4".  I used gold glitter paste with NND Pawprints stencil on the green strip.  After the pawprints had dried, I adhered the ribbon and bow.

I stamped out this super cute puppy image from NND Christmas Puppies stamp set.  He looks so ready for Christmas!  I also stamped out the Santa hat for the puppy to wear.  I colored the images with Copic markers, and cut them out with their coordinating dies.

For all of the circles on this card I used NND Circle Frames die set.  I attached all of the circles to the card with liquid glue, but before attaching the white circle, I stamped the sentiment and inked the edges of the circle in green.  I glued the puppy's Santa hat on his head and popped him up with foam tape for some dimension!


Copic colors used for Puppy:
  • E50, E51, E53, E15
  • Nose - R12, E93
Hat:
  • R05, R24, R27, R46, R39
Scarf:
  • YG01, YG05, YG07, YG09
  • R05, R27, R39
Candy Cane:
  • R05, R27, R39
Gift:
  • B32, B34, B37
Shadows:
  • T0, T1

To finish off this card I added glitter with a glitter pen, glossy accents, and a white pom-pom to the puppy's Santa hat!  Thank you and I hope you enjoyed my card today!

Meowy Christmas!

 Hi everyone!  Today I am sharing a card I created for Newton's Nook Designs Inky Paws Challenge #138 - Sketch Challenge.  I love the new Christmas kitties and thought they would work perfectly on this card!


This card is 5" x 7" and I started by cutting a piece of silver glitter cardstock to that size.  Next, I cut the red cardstock to 4 3/4" x 6 3/4" and adhered it to the glitter cardstock with liquid glue.  I find that liquid glue works best when adhering anything to glitter!  Next, I cut a strip of the red cardstock to 1 3/4" x 6 3/4".  I used silver glitter paste with NND Pawprints stencil on the red strip.  After the pawprints had dried, I adhered the ribbon and bow. 

I stamped out this adorable kitty image from NND A Kitten Christmas stamp set.  Isn't the kitty so cute with her Santa hat?  I also stamped out the holly to attach to her hat and candy cane.  I colored all of the images with Copic markers, and cut them out with their coordinating dies.

For all of the circles on this card I used NND Circle Frames die set.  I attached all of the circles to the card with liquid glue, but before attaching the white circle, I stamped the sentiment and inked the edges of the circle in red.  I popped the kitty up with foam tape for some dimension, and glued down her candy cane!


Copic colors used for Kitty:
  • T1, T3, T5
  • Nose and Ear - R12, E93
  • Cheeks - E93
Hat:
  • R05, R24, R27, R46, R39
Holly:
  • YG01, YG05, YG07, YG09
  • R05, R27, R39
Candy Cane:
  • R05, R27, R39
Shadows:
  • T0, T1

For finishing touches on this card I added glitter with a glitter pen, glossy accents, and a white pom-pom to the kitty's Santa hat!  Thank you and I hope you enjoyed my card today!

Wednesday, December 9, 2020

Tweet Warm Wishes

 Hi All!  Today I am sharing a card I made for Your Next Stamp Challenge #153 - Just for You.  I just love this stamp!  The little bird is so cute hanging up his ornaments! 


I started this card by die cutting a piece of smooth cardstock with the largest die in YNS Ripped Rectangles die set.  For the background I blended Distress Inks Tumbled Glass, Salty Ocean, and Blueprint Sketch.  Then I added a tiny bit of water to some white gouache and flicked it onto my background.  As the background was drying, I stamped the adorable YNS Tweet Warm Wishes image onto Copic friendly white paper, colored it, and cut it out with coordinating die.  

I decided on the navy cardstock after I was done coloring, and used the largest die in YNS Stitched Rectangle die set to cut the navy piece.  I mounted the navy cardstock onto a piece of silver glitter cardstock, and then mounted my ink blended piece onto the navy.  I used foam tape to adhere and give dimension to my colored image!  I then used YNS Stitched Fishtail Banner die set to cut out the banner for my sentiment.  I stamped the sentiment and inked the edges of the banner in navy blue.


Copic colors used for Bird:
  • BG000, BG01, BG02, BG05
  • Y08, Y17, YR04
Branch:
  • E31, E33, E35, E57, E79
Leaves:
  • YG01, YG03, YG06, YG09
Hat, Berries, Candy Cane:
  • R05, R24, R46, R39
Ornaments:
  • Yellow - Y11, Y13, Y15, Y17
  • Pink - RV10, RV21, RV23, RV25
  • Purple - V000, V01, V12, V04
Shadows:
  • C1, C3

For finishing touches on this card I added glitter with a glitter pen to the hat and ornaments, and glossy accents to the bird's beak, berries, and candy cane.  Thank you and I hope you enjoyed my card today!

Sunday, December 6, 2020

Alcohol Ink Merry Christmas Ornaments

 Hi everyone!  Today I am sharing three ornaments I created using alcohol inks.  It was a lot of fun, but my hands got a little messy.  I might wear gloves next time I use them!  Lol!!  I am entering these ornaments into Simon Says Stamp Monday Challenge - Focus on Alcohol Inks and Simon Says Stamp Wednesday Challenge - Fun With Dies. 


I used Alcohol Pearl Ink colors Tranquil, Enchanted, and Sublime on SSS Yupo Paper.  I used my heat tool to help speed up the drying time on the ink.  I then die cut white glitter cardstock using the SSS Merry Christmas Ornament die.  I used a glue pen to adhere the die cut pieces to the yupo paper, and then cut around the edges of the ornament with my mini snips. 


I finished off the ornaments by adding iridescent crystals to the center of the snowflakes, and a ribbon at the top.  These are beautiful ornaments for your Christmas tree or to add to gifts!  Thank you and I hope you enjoyed my project today!

Wednesday, December 2, 2020

Merry and Bright Christmas Wreath

  Hi everyone!  I am sharing a card I made for Newton's Nook Designs Inky Paws Challenge #137 - Color Challenge.  The colors are Lime Green, Grass Green, Red, and White, and Simon Says Stamp Wednesday Challenge - Fun With Dies.  I am trying to use more dies to create my cards and Newton's Nook Designs Pines and Holly die set is perfect to make a Chistmas wreath!


For this card I cut a piece of red glitter cardstock to A6 size, which is 6 1/4" x 4 1/2".  I then cut a piece of white woodgrain cardstock to 6" x 4 1/4", and adhered it to the red glitter cardstock with liquid glue.  I used NND Pines and Holly die set to cut many holly and pine pieces out of smooth white cardstock, and the berry pieces out of red glitter cardstock.  I used Distress Oxide Inks Twisted Citron and Mowed Lawn on the holly pieces, and Evergreen Bough, Rustic Wilderness, and Pine Needles on the pine pieces.  After all of the inked pieces were dry, I arranged the pine pieces in two layers on the bottom, and the holly pieces on top.  I added the red glitter berries and made a bow out of wired ribbon for the top of the wreath.

Next, I white heat embossed a sentiment from NND Ornamental Wishes stamp set onto red cardstock.  I fussy cut around it, and attached it to my card with foam tape for some dimension!


For a finishing touch on this card I added a few raindrop crystals!  Thank you and I hope you enjoyed my card today!