Tuesday, May 31, 2022

HB2U Monster Card

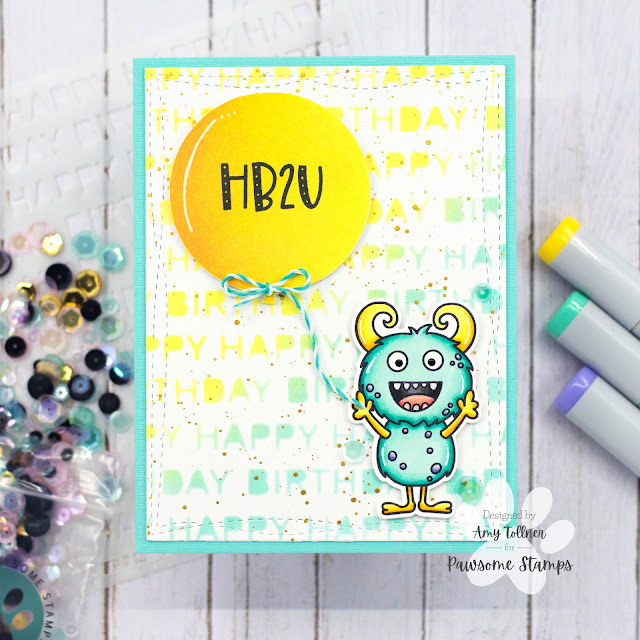
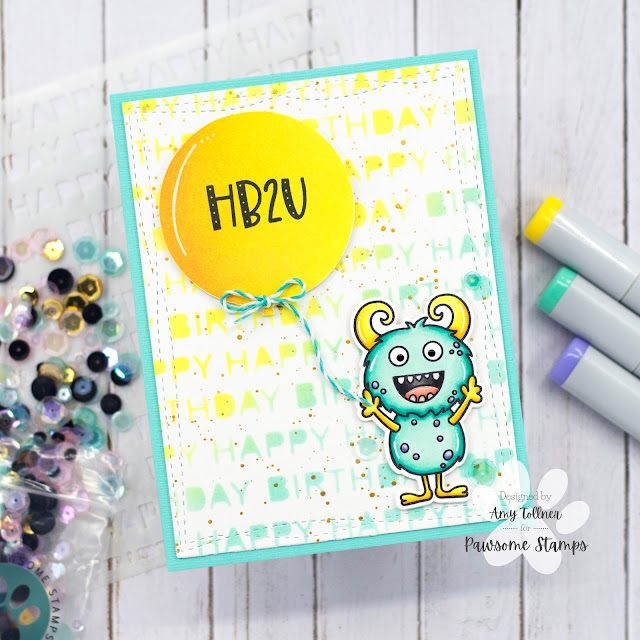
 Hi everyone!  I am up on the Pawsome Stamps blog today with this card I created using items from the new release, and this adorable monster from the Monster Party Stamp Set.  I just love him!  

Happy Birthday Stencil, Birthday Balloons Stencil, XL Birthday Greetings Stamp Set, Monster Party Stamp and Die Set by Pawsome Stamps #pawsomestamps #handmade

To start this card I die cut a piece of smooth white cardstock and used the new Happy Birthday Stencil with Distress Oxide Inks Squeezed Lemonade and Salvaged Patina to create a bright and fun background for my monster!  I then splattered the background with gold watercolor paint and set it aside to dry.  

Next, I used the new Birthday Balloons Stencil with Distress Oxide Inks Squeezed Lemonade, Mustard Seed, and a touch of Spiced Marmalade.  I fussy cut the balloon out, and stamped the "HB2U" sentiment from the new XL Birthday Greetings Stamp Set onto the balloon in black pigment ink.  

Happy Birthday Stencil, Birthday Balloons Stencil, XL Birthday Greetings Stamp Set, Monster Party Stamp and Die Set by Pawsome Stamps #pawsomestamps #handmade

I stamped out this super cute monster from the Monster Party Stamp Set, colored him with Copic markers, and cut him out using the coordinating die set.  

I assembled my card using teal cardstock for the base, and foam tape to pop up the balloon and monster for some dimension!  I used teal and white twine to create a ribbon so the monster could be holding the balloon!  

Happy Birthday Stencil, Birthday Balloons Stencil, XL Birthday Greetings Stamp Set, Monster Party Stamp and Die Set by Pawsome Stamps #pawsomestamps #handmade

For finishing touches on this card I added accents with a white gel pen, glossy accents, glitter to the monster's spots, and a few sparkling sequins from the new Mint Chip Sequin Mix!  I hope you enjoyed my card today.  Head on over to the Pawsome Stamps online shop to check out the new May Release! 

Monday, May 30, 2022

Inky Paws Challenge #174 - Reminder Post

  Hi everybody!  This is an Inky Paws Challenge reminder post!  This is Inky Paws Challenge #174 - Sketch Challenge.  You have until Friday, June 3rd to get your entries in and have a chance to win a $20 store credit to Newton's Nook Designs online shop!

Newton's Nook Designs Inky Paws Challenge - Sketch Challenge

Dog Silhouette Die Set, Heart Frames Die Set, A Dog's Life Paper Pad by Newton's Nook Designs #newtonsnook #handmade

To start this card I cut a piece of paw print patterned paper from the new A Dog's Life Paper Pad to A2 size.  I then cut a piece of paper with the words "bark" and "woof," and some hearts to 4 1/4" x 1 1/2", and a piece of bone patterned paper to 4 1/4" x 1/2", all from the same paper pad.  I then cut a piece of pink textured cardstock using the Heart Frames Die Set

Next, I used the brand new, and gorgeous, Dog Silhouette Die Set to cut this cute little pup out of black velvet paper, and I just had to give him a red glitter collar! 

Dog Silhouette Die Set, Heart Frames Die Set, A Dog's Life Paper Pad by Newton's Nook Designs #newtonsnook #handmade

Since I used patterned paper with wording, I decided to have the wording act as my sentiment, and not add in a separate one.    

I assembled my card adhering all the layers together, and used foam tape to pop up the heart for some dimension.  I used pink and white twine for the bow.  

Dog Silhouette Die Set, Heart Frames Die Set, A Dog's Life Paper Pad by Newton's Nook Designs #newtonsnook #handmade

For finishing touches on this card I added a few sparkling sequins!  Now it's time to get your paws inky creating a project for the Sketch Challenge using your Newton's Nook Designs products.  Be sure to link up to the Inky Paws Challenge!  Hope to see you there!

Monday, May 23, 2022

Inky Paws Challenge #174 - Sketch Challenge

 Hi everybody!  A new Inky Paws Challenge starts today!  This is Inky Paws Challenge #174 - Sketch Challenge.  You have until Friday, June 3rd to get your entries in and have a chance to win a $20 store credit to Newton's Nook Designs online shop!  I just love the new Newton's Nook Paper Pads and thought this challenge would be the perfect chance to use them!

Newton's Nook Designs Inky Paws Challenge - Sketch Challenge

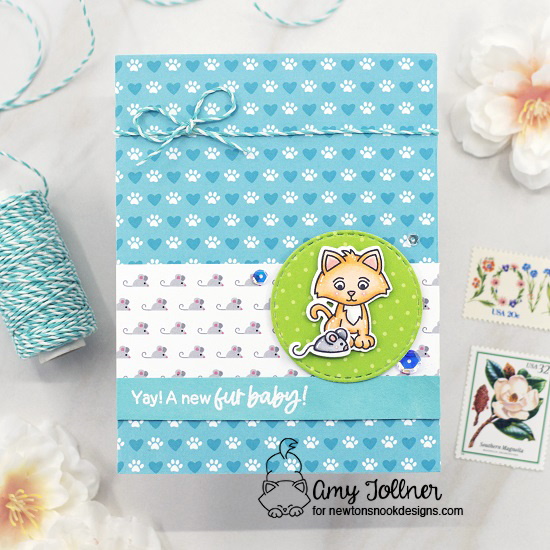
Welcome New Cat Stamp and Die Set, Circle Frames Die Set, A Cat's Life Paper Pad by Newton's Nook Designs #newtonsnook #handmade

To start this card I cut a piece of paw print patterned paper from the new A Cat's Life Paper Pad to A2 size.  I then cut a piece of the super cute mouse patterned paper from the same paper pad to 4 1/4" x 1 1/2", and a piece of teal cardstock to 4 1/4" x 1/2".  I used the Circle Frames Die Set to cut a piece of green polka dot paper, also from A Cat's Life Paper Pad.  

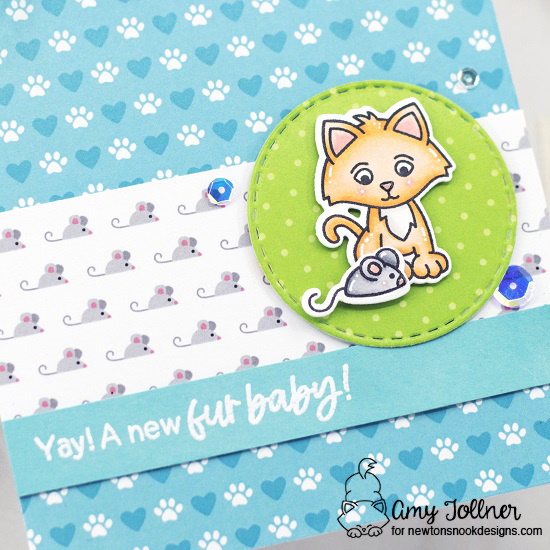
Next, I stamped this adorable kitten and mouse from the Welcome New Cat Stamp Set, colored them with Copic markers, and cut them out using the coordinating die set.  

Welcome New Cat Stamp and Die Set, Circle Frames Die Set, A Cat's Life Paper Pad by Newton's Nook Designs #newtonsnook #handmade

I stamped the sentiment, which is from the Welcome New Cat Stamp Set, onto the piece of teal cardstock and white heat embossed.  

I assembled my card adhering all the layers together, and used foam tape to pop up the kitty and mouse for some dimension.  I used teal and white twine for the bow.  

Welcome New Cat Stamp and Die Set, Circle Frames Die Set, A Cat's Life Paper Pad by Newton's Nook Designs #newtonsnook #handmade

For finishing touches on this card I added accents with a white gel pen, glossy accents on their noses, and a few sparkling sequins!  Now it's time to get your paws inky creating a project for the Sketch Challenge using your Newton's Nook Designs products.  Be sure to link up to the Inky Paws Challenge!  Hope to see you there!

Sunday, May 22, 2022

You're the Best

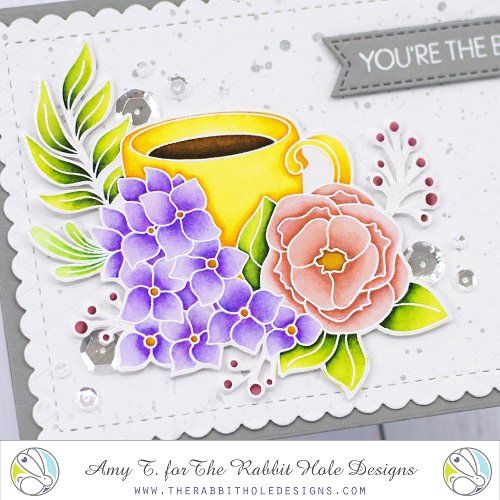
 Hi everyone!  Today I am sharing a card I created using the beautiful Spring Coffee Stamp Set and the Mesh - Optical Illusion Stencil by The Rabbit Hole Designs!

Spring Coffee Stamp Set, Mesh - Optical Illusion Stencil, Thanks - Scripty Stamp Set by The Rabbit Hole Designs #therabbitholedesignsllc #therabbitholedesigns

To start this card I die cut a piece of smooth white cardstock and dry embossed the Mesh - Optical Illusion Stencil onto it by running it through my die cutting machine a few times.  It is difficult to see the embossed background in the pictures, but it looks great in person!  I then splattered the background with watercolor paint and set it aside to dry.

Next, I stamped and white heat embossed the absolutely gorgeous Spring Coffee image onto smooth white cardstock, colored it with Zig Clean Color Real Brush Markers, and fussy cut it out.

Spring Coffee Stamp Set, Mesh - Optical Illusion Stencil, Thanks - Scripty Stamp Set by The Rabbit Hole Designs #therabbitholedesignsllc #therabbitholedesigns

I die cut a gray fishtail banner, stamped the sentiment, which is from the Thanks - Scripty Stamp Set, onto the banner, and white heat embossed.  

I assembled my card using gray cardstock for the base, and foam tape to pop up the image and sentiment banner for some dimension!

Spring Coffee Stamp Set, Mesh - Optical Illusion Stencil, Thanks - Scripty Stamp Set by The Rabbit Hole Designs #therabbitholedesignsllc #therabbitholedesigns

For finishing touches on this card I added a few sparkling sequins!  Thank you and I hope you enjoyed my card today!
Monday, May 16, 2022

Inky Paws Challenge #173 - Color Challenge Reminder Post

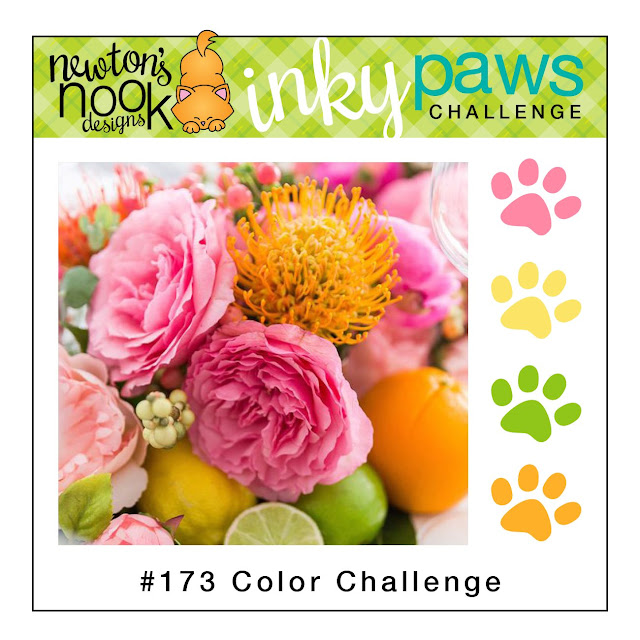
 Hi everybody!  This is an Inky Paws Challenge reminder post!  This is Inky Paws Challenge #173 - Color Challenge.  The colors are Bubble Gum Pink, Lemon Yellow, Lime Green, and Orange.  You have until Friday, May 20th to get your entries in and have a chance to win a $20 store credit to Newton's Nook Designs online shop!

Newton's Nook Designs Inky Paws Challenge - Color Challenge
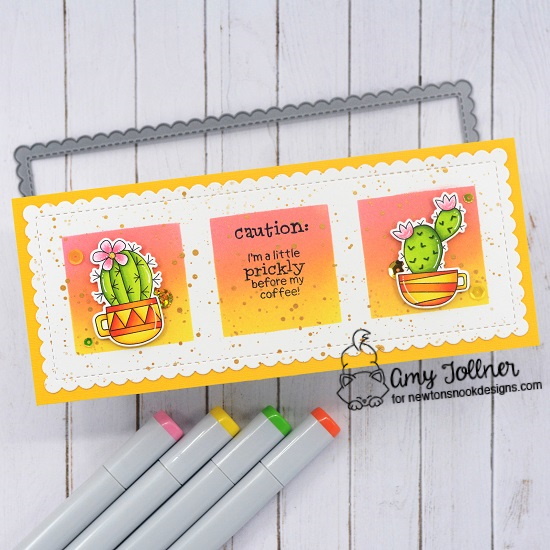
Cuppa Cactus Stamp and Die Set, Slimline Frames and Portholes Die Set, Slimline Masking Circles and Squares Stencil Set by Newton's Nook Designs #newtonsnookdesigns #newtonsnook #handmade

To start this card I die cut a piece of smooth white cardstock using the scalloped edge die in the Slimline Frames and Portholes Die Set.  I used the square stencil from the Slimline Masking Circles & Squares Stencil Set with Distress Oxide Inks Worn Lipstick, Spiced Marmalade, and Squeezed Lemonade to create a colorful background.  I then splattered the panel with gold watercolor paint and set it aside to dry.

Next, I stamped out the gorgeous cactus images from the Cuppa Cactus Stamp Set.  I just love this set!  I colored the images with Copic markers and cut them out with their coordinating die set.  

Cuppa Cactus Stamp and Die Set, Slimline Frames and Portholes Die Set, Slimline Masking Circles and Squares Stencil Set by Newton's Nook Designs #newtonsnookdesigns #newtonsnook #handmade

Cuppa Cactus Stamp and Die Set, Slimline Frames and Portholes Die Set, Slimline Masking Circles and Squares Stencil Set by Newton's Nook Designs #newtonsnookdesigns #newtonsnook #handmade

After the watercolor splatter had dried, I stamped the sentiment, which is from the Cuppa Cactus Stamp Set, directly onto my background in the center square in black pigment ink and clear heat embossed.

I assembled my card adhering the background to a textured yellow cardbase, and used foam tape to adhere the images and give some dimension to my card!

Cuppa Cactus Stamp and Die Set, Slimline Frames and Portholes Die Set, Slimline Masking Circles and Squares Stencil Set by Newton's Nook Designs #newtonsnookdesigns #newtonsnook #handmade

For finishing touches on this card I added accents with a white gel pen, glitter, and a few sparkling sequins!  Now it's time to get your paws inky creating a project for the Color Challenge using your Newton's Nook Designs products.  Be sure to link up to the Inky Paws Challenge!  Hope to see you there!

Sunday, May 15, 2022

Blooming Anemone Hello Card

  Hi everyone!  Today I am sharing a card I created using the beautiful Blooming Anemone Stamp Set and Mesh - Optical Illusion Stencil by The Rabbit Hole Designs!

Blooming Anemone Stamp and Die Set, Mesh - Optical Illusion Stencil, Hello - Scripty Word with Shadow Layer Dies by The Rabbit Hole Designs #therabbitholedesignsllc #therabbitholedesigns

To start this card I die cut a piece of smooth white cardstock and used the Mesh - Optical Illusion Stencil with Distress Oxide Inks Squeezed Lemonade, Mustard Seed, and Weathered Wood to create a bright and gorgeous background!  I then splattered the background with gold watercolor paint and set it aside to dry.

I stamped out the absolutely beautiful Blooming Anemone image, illustrated by Tatsiana Zayats, and white heat embossed.  I colored the image with Zig Clean Color Real Brush Markers, and cut it out using the coordinating die set.

Blooming Anemone Stamp and Die Set, Mesh - Optical Illusion Stencil, Hello - Scripty Word with Shadow Layer Dies by The Rabbit Hole Designs #therabbitholedesignsllc #therabbitholedesigns

Next, I die cut the word "Hello" with the Hello - Scripty Word with Shadow Layer Dies, using gold glitter cardstock for the shadow.

I assembled my card using gold glitter cardstock for the base, and foam tape to pop up the sentiment and image for some dimension!

Blooming Anemone Stamp and Die Set, Mesh - Optical Illusion Stencil, Hello - Scripty Word with Shadow Layer Dies by The Rabbit Hole Designs #therabbitholedesignsllc #therabbitholedesigns

For finishing touches on this card I added a few sparkling sequins!  Thank you and I hope you enjoyed my card today!

Saturday, May 14, 2022

Pawsome Stamps Sneak Peek Day 3!

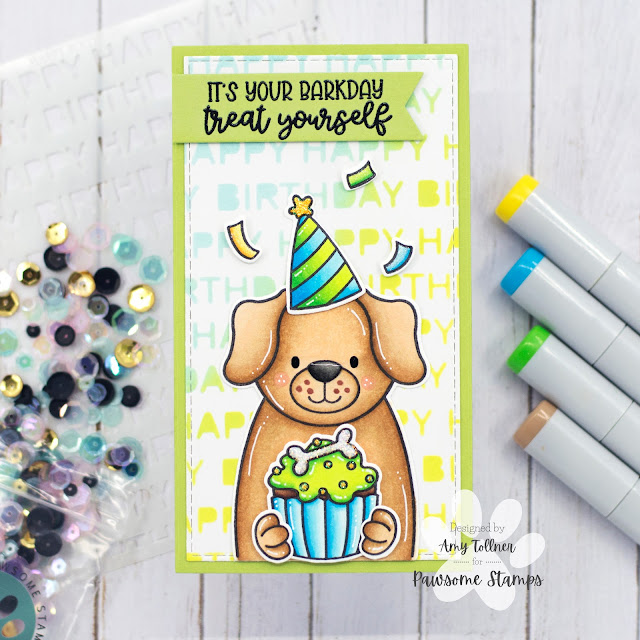
  Hi everyone!  Today is Day 3 of Sneak Peeks for Pawsome Stamps birthday release!  The full release will be available in the Pawsome Stamps online shop on Tuesday, May 17th!!  We are featuring two new stamp sets today, so I have created two cards to share with you!

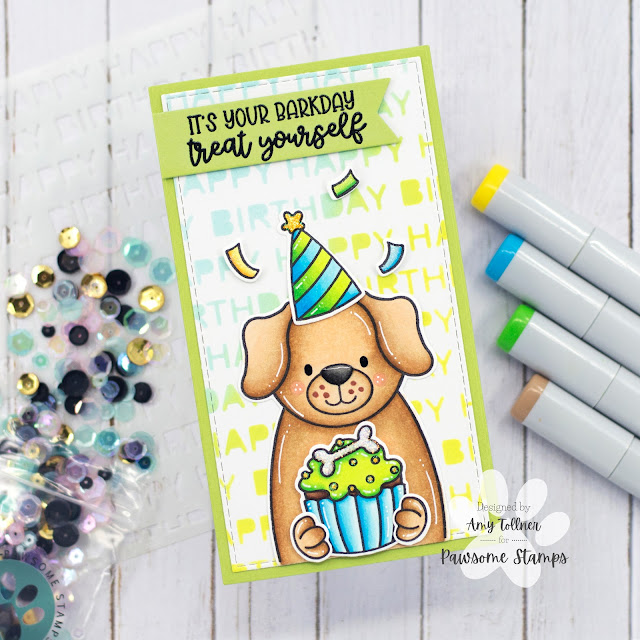
Pawsome Birthday Stamp and Die Set, Happy Birthday Stencil by Pawsome Stamps #pawsomestamps #handmade

For my first card I die cut a piece of smooth white cardstock, and used the brand new Happy Birthday Stencil with Distress Oxide Inks Tumbled Glass and Twisted Citron to create the background.  

I then stamped the super cute pup and accessories from the new Pawsome Birthday Stamp Set, colored them with Copic markers, and cut them out using the coordinating die set.  

Pawsome Birthday Stamp and Die Set, Happy Birthday Stencil by Pawsome Stamps #pawsomestamps #handmade

I die cut a green fishtail banner for the sentiment, which I stamped in black pigment ink and clear heat embossed for some shine!  

I assembled my card with a green cardbase cut to mini slimline size, and adhered the pup and hat directly onto my background.  I adhered the cupcake, paws, confetti, and sentiment banner with foam tape for some dimension!  

Pawsome Birthday Stamp and Die Set, Happy Birthday Stencil by Pawsome Stamps #pawsomestamps #handmade

For finishing touches on this card I added accents with a white gel pen, glitter, and glossy accents!

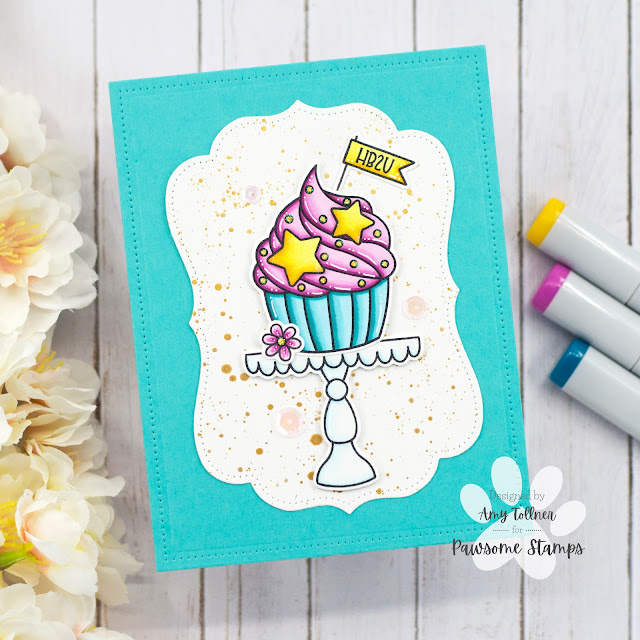
For my second card, I used the gorgeous new Bday Cupcakes Stamp Set!

Bday Cupcakes Stamp and Die Set, Unicorn Dust Sequin Mix by Pawsome Stamps #pawsomestamps #handmade

To start this card I die cut a piece of white cardstock for a background, splattered it with gold watercolor paint, and set it aside to dry.  

I stamped this beautiful cupcake and accessories from the new Bday Cupcakes Stamp Set, colored them with Copic markers, and cut them out with the coordinating die set.  

Bday Cupcakes Stamp and Die Set, Unicorn Dust Sequin Mix by Pawsome Stamps #pawsomestamps #handmade

I assembled my card using a teal cardbase, and foam tape to pop up the images for some dimension on my card!

For finishing touches on this card I added white gel pen accents, glitter, and a few sparkling sequins from the brand new and gorgeous Unicorn Dust Sequin Mix!

Bday Cupcakes Stamp and Die Set, Unicorn Dust Sequin Mix by Pawsome Stamps #pawsomestamps #handmade

Thank you and I hope you enjoyed these Sneak Peeks today!  Be sure to check out all of the brand new stamps, stencils, and sequin mixes that will be available in the Pawsome Stamps online shop on Tuesday, May 17th!

Monday, May 9, 2022

Inky Paws Challenge #173 - Color Challenge

 Hi everybody!  A new Inky Paws Challenge starts today!  This is Inky Paws Challenge #173 - Color Challenge.  The colors are Bubble Gum Pink, Lemon Yellow, Lime Green, and Orange.  You have until Friday, May 20th to get your entries in and have a chance to win a $20 store credit to Newton's Nook Designs online shop!  I hope everyone had a wonderful Mother's Day, and here is the card I made for my mom!

Newton's Nook Designs Inky Paws Challenge - Color Challenge
Best Mom Oval, Oval Frames Die Set, Frames and Flags Die Set by Newton's Nook Designs #newtonsnookdesigns #newtonsnook #handmade

To start this card I stamped the beautiful Best Mom Oval image onto smooth white cardstock and white heat embossed.  I colored the gorgeous flowers with Zig Clean Color Real Brush Markers.  I then used the largest scalloped oval die in the Oval Frames Die Set to cut out the image.  I stamped the sentiment in the center of the oval in gray pigment ink and clear heat embossed for some shine!  

Best Mom Oval, Oval Frames Die Set, Frames and Flags Die Set by Newton's Nook Designs #newtonsnookdesigns #newtonsnook #handmade

Next, I found matching yellow cardstock and die cut it using the scalloped frame die from the Frames and Flags Die Set.  I then decided on a textured pink cardbase and adhered the layers together, popping up the oval for some dimension!

Best Mom Oval, Oval Frames Die Set, Frames and Flags Die Set by Newton's Nook Designs #newtonsnookdesigns #newtonsnook #handmade

For finishing touches on this card I added a few sparkling sequins!  Now it's time to get your paws inky creating a project for the Color Challenge using your Newton's Nook Designs products.  Be sure to link up to the Inky Paws Challenge!  Hope to see you there!

Sunday, May 8, 2022

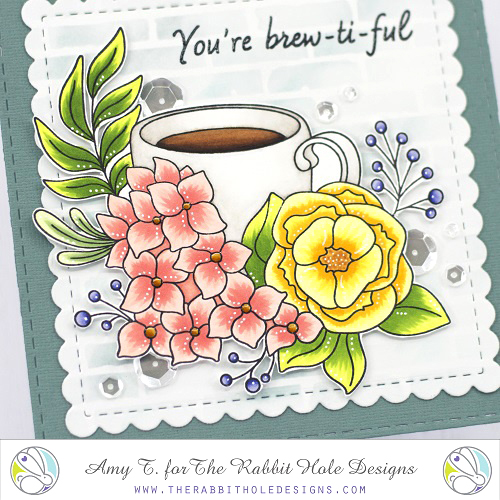
You're Brew-ti-ful

 Hi everyone!  Today I am sharing a card I created using the beautiful Spring Coffee Stamp Set and Back Alley Stencil by The Rabbit Hole Designs!

Spring Coffee Stamp Set, Back Alley Stencil by The Rabbit Hole Designs #therabbitholedesignsllc #therabbitholedesigns

To start this card I die cut a piece of smooth white cardstock and used the Back Alley Stencil with Distress Oxide Inks Salvaged Patina and Weathered Wood to create a distressed look for my background.

I stamped out the gorgeous Spring Coffee image, colored it with Copic markers, and fussy cut it out. 

Spring Coffee Stamp Set, Back Alley Stencil by The Rabbit Hole Designs #therabbitholedesignsllc #therabbitholedesigns

Next, I stamped the sentiment in black pigment ink directly onto my background, and clear heat embossed for some shine!

I assembled my card using textured teal cardstock for the base, and foam tape to pop up the image for some dimension!

Spring Coffee Stamp Set, Back Alley Stencil by The Rabbit Hole Designs #therabbitholedesignsllc #therabbitholedesigns

For finishing touches on this card I added accents with a white gel pen and a few sparkling sequins!  Thank you and I hope you enjoyed my card today!
Monday, May 2, 2022

Inky Paws Challenge #172 - Reminder Post

 Hi everybody!  This is an Inky Paws Challenge reminder post!  This is Inky Paws Challenge #172 - Birthday Theme.  You have until Friday, May 6th to get your entries in and have a chance to win a $20 store credit to Newton's Nook Designs online shop!  

Newton's Nook Designs Inky Paws Challenge - Birthday Theme

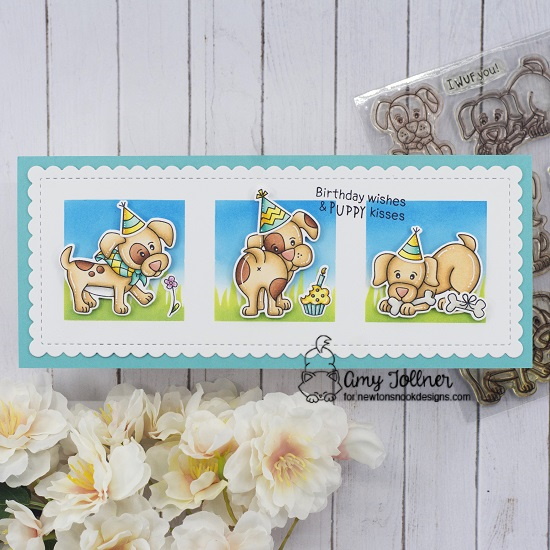
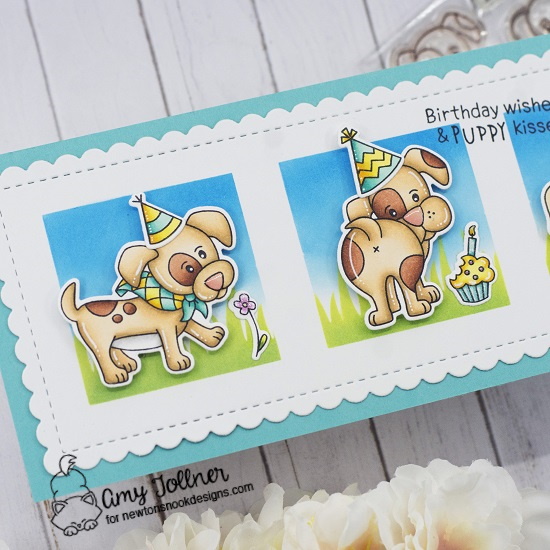
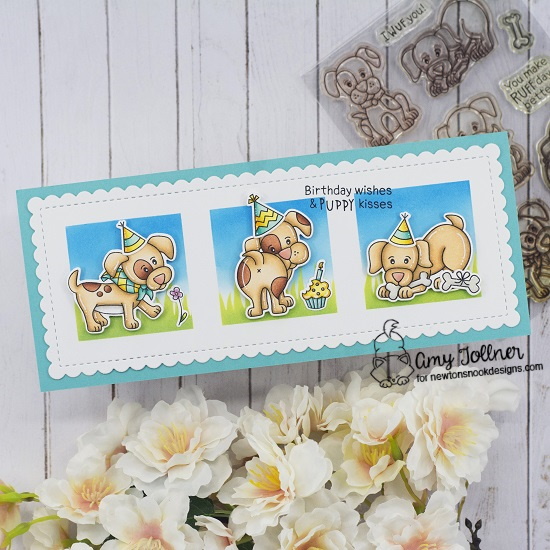
Puppy Playtime Stamp and Die Set, Bleat Stamp and Die Set, Newton's Birthday Bash Stamp and Die Set, Christmas Puppies Stamp and Die Set, Hills & Grass Stencil, Slimline Masking Circles & Squares Stencil Set, Slimline Frames & Portholes Die Set by Newton's Nook Designs #newtonsnook #handmade

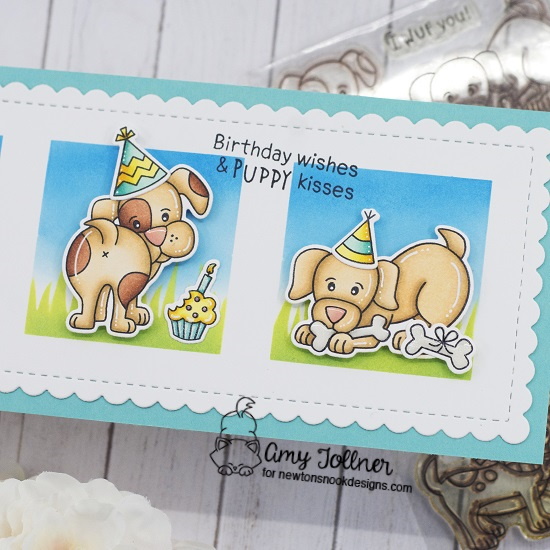
To start this card I die cut a piece of smooth white cardstock using the scalloped edge die in the Slimline Frames and Portholes Die Set.  I used the square stencil from the Slimline Masking Circles & Squares Stencil Set with Distress Oxide Inks Tumbled Glass and Salty Ocean to create a sky.  Leaving the square stencil in place, I used the Hills & Grass Stencil with Twisted Citron and Mowed Lawn to create the grass!

Next, I stamped out the super cute pup images from the Puppy Playtime Stamp Set, colored them with Copic markers, and cut them out with the coordinating die set.  Their accessories come from the Bleat Stamp Set, Newton's Birthday Bash Stamp Set, and the Christmas Puppies Stamp Set.  

Puppy Playtime Stamp and Die Set, Bleat Stamp and Die Set, Newton's Birthday Bash Stamp and Die Set, Christmas Puppies Stamp and Die Set, Hills & Grass Stencil, Slimline Masking Circles & Squares Stencil Set, Slimline Frames & Portholes Die Set by Newton's Nook Designs #newtonsnook #handmade

Puppy Playtime Stamp and Die Set, Bleat Stamp and Die Set, Newton's Birthday Bash Stamp and Die Set, Christmas Puppies Stamp and Die Set, Hills & Grass Stencil, Slimline Masking Circles & Squares Stencil Set, Slimline Frames & Portholes Die Set by Newton's Nook Designs #newtonsnook #handmade

I stamped the sentiment, which is from the Puppy Playtime Stamp Set, directly onto my background!

I assembled my card adhering the background to a teal cardbase.  I used foam tape to pop up the pups on my card for some dimension! 

Puppy Playtime Stamp and Die Set, Bleat Stamp and Die Set, Newton's Birthday Bash Stamp and Die Set, Christmas Puppies Stamp and Die Set, Hills & Grass Stencil, Slimline Masking Circles & Squares Stencil Set, Slimline Frames & Portholes Die Set by Newton's Nook Designs #newtonsnook #handmade

For finishing touches on this card I added accents with a white gel pen, glitter, and glossy accents to the puppy's noses!  Now it's time to get your paws inky creating a Birthday Theme project using your Newton's Nook Designs products!  Be sure to link up to the Inky Paws Challenge!  Hope to see you there! 

Sunday, May 1, 2022

Happy Birthday to Pawsome Stamps!

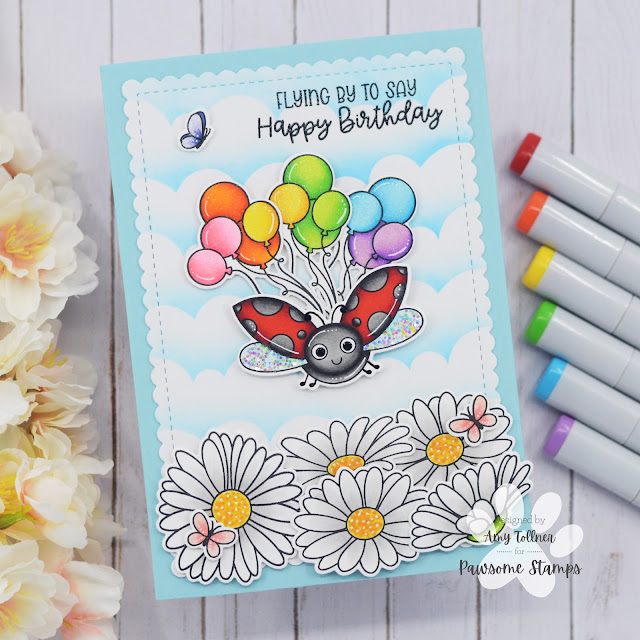
 Hi everyone!  I am up on the Pawsome Stamps blog today sharing a birthday card I created in honor of Pawsome Stamps birthday month!  To celebrate Pawsome Stamps turning One this month, use the code 1STBDAY at checkout to receive 25% off all items in your order!  The code is valid May 1 - 8, 2022.   

Little Lady Stamp and Die Set, Oopsy Daisy Stamp and Die Set, Spring Day Stamp and Die Set, Clouds for Days Stencil by Pawsome Stamps #pawsomestamps #handmade


To start this card I die cut a piece of smooth white cardstock and used the Clouds for Days Stencil with Distress Oxide Inks Tumbled Glass and Salty Ocean to create a background of fluffy clouds!

I then stamped out images from a few different stamp sets.  The ladybug is from the Little Lady Stamp Set, the daisies are from the Oopsy Daisy Stamp Set, and the balloons and butterflies are from the Spring Day Stamp Set.  I colored all of the images with Copic markers and cut them out using their coordinating die sets.  

Little Lady Stamp and Die Set, Oopsy Daisy Stamp and Die Set, Spring Day Stamp and Die Set, Clouds for Days Stencil by Pawsome Stamps #pawsomestamps #handmade

Next, I stamped the sentiment, which is from the Little Lady Stamp Set, directly onto my background in black pigment ink and clear heat embossed for some shine!

I assembled my card on a blue A7 size cardbase, adhering the images with liquid glue, and thin and thick foam tape to create dimension.  

Little Lady Stamp and Die Set, Oopsy Daisy Stamp and Die Set, Spring Day Stamp and Die Set, Clouds for Days Stencil by Pawsome Stamps #pawsomestamps #handmade

For finishing touches on this card I added accents with a white gel pen, chunky glitter to the ladybug's wings, and glitter with a glitter pen to the balloons and butterflies.  I hope you enjoyed my card!  Be sure to visit the Pawsome Stamps online shop, and use the code 1STBDAY to get 25% off your entire order from now until May 8, 2022!  Have a great day!

Blooming Anemone Friend Card

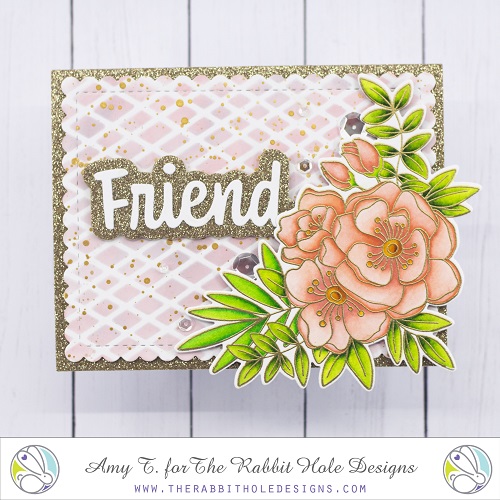
 Hi everyone!  Today I am sharing a card I created using the new and gorgeous Blooming Anemone Stamp Set and Mesh - Optical Illusion Stencil by The Rabbit Hole Designs!
Blooming Anemone Stamp and Die Set, Mesh - Optical Illusion Stencil, Friend - Scripty Word with Shadow Layer Dies by The Rabbit Hole Designs #therabbitholedesignsllc #therabbitholedesigns

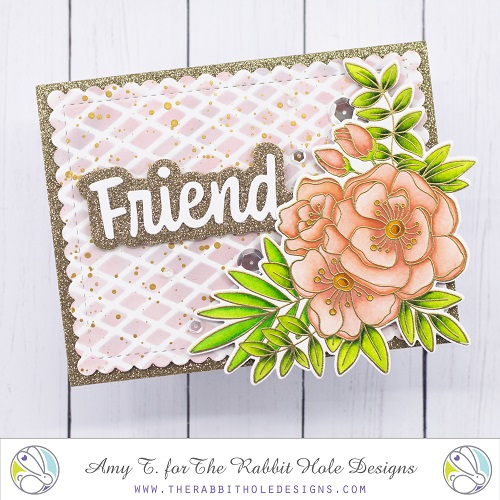
To start this card I die cut a piece of smooth white cardstock and used the Mesh - Optical Illusion Stencil with Distress Oxide Inks Saltwater Taffy and Weathered Wood to create a beautiful background!  I then splattered the background with gold watercolor paint and set it aside to dry.

I stamped out the absolutely gorgeous Blooming Anemone image, illustrated by Tatsiana Zayats, and gold heat embossed.  I colored the image with Zig Clean Color Real Brush Markers, and cut it out using the coordinating die set.

Blooming Anemone Stamp and Die Set, Mesh - Optical Illusion Stencil, Friend - Scripty Word with Shadow Layer Dies by The Rabbit Hole Designs #therabbitholedesignsllc #therabbitholedesigns

Next, I die cut the word "Friend" with the Friend - Scripty Word with Shadow Layer Dies, using gold glitter cardstock for the shadow.

I assembled my card using gold glitter cardstock for the base, and foam tape to pop up the sentiment and image for some dimension!

Blooming Anemone Stamp and Die Set, Mesh - Optical Illusion Stencil, Friend - Scripty Word with Shadow Layer Dies by The Rabbit Hole Designs #therabbitholedesignsllc #therabbitholedesigns

For finishing touches on this card I added a few sparkling sequins!  Thank you and I hope you enjoyed my card today!