Thursday, October 28, 2021

Silver Bells Slimline Card and Pawsome Stamps October Release!

 Hi everyone!  Pawsome Stamps October Release is here!  Head on over to the Pawsome Stamps website to pick up all your new faves!  We are also having an Instagram Hop today so be sure to join in the fun to win some awesome prizes!  I love the new Special Delivery Stamp Set!  As soon as I saw the bells on the stamps, I knew I wanted to create a card like this!  

Special Delivery Stamp and Die Set, Just Sentiments: Christmas Stamp Set by Pawsome Stamps #pawsomestamps #handmade

I started this card by cutting a cardbase to slimline size from dark blue cardstock.  I used the same cardstock to die cut the windows, and I used a scalloped frame die to cut the silver glitter cardstock. 

Special Delivery Stamp and Die Set, Just Sentiments: Christmas Stamp Set by Pawsome Stamps #pawsomestamps #handmade

I then stamped out the beautiful bell stamp and holly two times from the Special Delivery Stamp Set.  I colored them with Copic markers, and fussy cut them out.  There is a coordinating die set available!  

Next, I stamped a sentiment from the new Just Sentiments: Christmas Stamp Set onto the dark blue cardstock and white heat embossed.  I fussy cut around the sentiment so it would fit perfectly in the middle window.  

Special Delivery Stamp and Die Set, Just Sentiments: Christmas Stamp Set by Pawsome Stamps #pawsomestamps #handmade

Special Delivery Stamp and Die Set, Just Sentiments: Christmas Stamp Set by Pawsome Stamps #pawsomestamps #handmade

With all of my pieces ready, it was time to assemble my card!  I adhered the silver glitter cardstock to my cardbase, and used thin foam tape to adhere the windows to the glitter cardstock.  I then used foam tape to adhere all of my images and the sentiment for some more dimension!

Special Delivery Stamp and Die Set, Just Sentiments: Christmas Stamp Set by Pawsome Stamps #pawsomestamps #handmade

For a finishing touch on this card I added accents with a white gel pen.  I hope you enjoyed my card today!  Don't forget to join in the fun of the IG Hop to win some great prizes!  Get your Special Delivery Stamp and Die Set, and Just Sentiments: Christmas Stamp Set on the Pawsome Stamps website today!

Monday, October 25, 2021

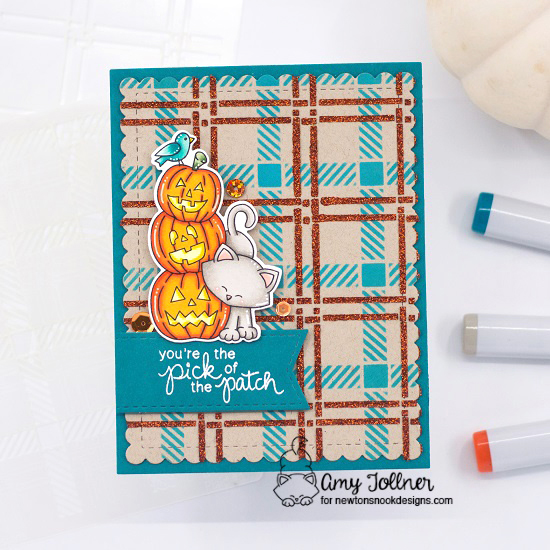
Inky Paws Challenge #160 - Cozy Plaid Theme

 Hi everybody!  A new Inky Paws Challenge starts today!  You have until Friday, November 5th to get your entries in and have a chance to win a $20 store credit to Newton's Nook Designs online shop!  This is Inky Paws Challenge #160 - Cozy Plaid Theme

Newton's Nook Designs Inky Paws Challenge - Cozy Plaid Theme
Newton's Boo-tiful Night Stamp and Die Set, Plaid Stencil Set, Frames and Flags Die Set by Newton's Nook Designs #newtonsnook #handmade

I started this card by cutting a piece of teal cardstock to A2 size for my cardbase.  Next, I die cut a piece of kraft cardstock with the scalloped frame die from the Frames and Flags Die Set.  I then used Peacock Feathers Distress Oxide Ink with Plaid #1 from the Plaid Stencil Set, and orange glitter paste with the Plaid #2 stencil from the set.  I thought the glitter paste was a perfect autumn orange color, and it gets some glitter on my card!

Newton's Boo-tiful Night Stamp and Die Set, Plaid Stencil Set, Frames and Flags Die Set by Newton's Nook Designs #newtonsnook #handmade

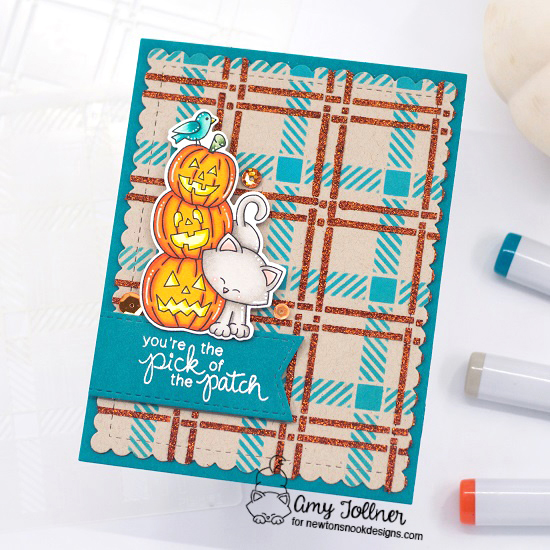
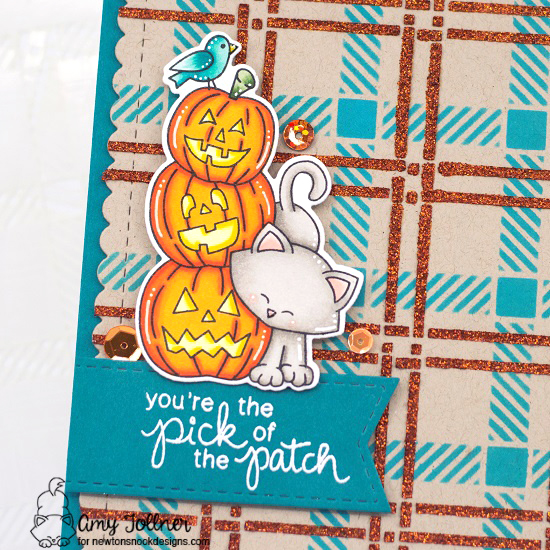
Next, I stamped this super cute image of Newton by a stack of pumpkins from Newton's Boo-tiful Night Stamp Set, colored it with Copic markers, and cut it out with the coordinating die.  

I used the stitched banner die from the Frames and Flags Die Set to cut a teal banner, and white heat embossed the sentiment.  

Newton's Boo-tiful Night Stamp and Die Set, Plaid Stencil Set, Frames and Flags Die Set by Newton's Nook Designs #newtonsnook #handmade

I assembled my card by adhering the plaid background to the teal cardbase, and used foam tape to adhere the sentiment banner and my image for some dimension!  

Newton's Boo-tiful Night Stamp and Die Set, Plaid Stencil Set, Frames and Flags Die Set by Newton's Nook Designs #newtonsnook #handmade

For finishing touches on this card I added white gel pen accents, glossy accents to Newton's nose and the bird's beak, and a few sparkling sequins!  Now it's time to get your paws inky creating a Cozy Plaid Theme project and your Newton's Nook Designs products!  Be sure to link up to the Inky Paws ChallengeHope to see you there!

Monday, October 18, 2021

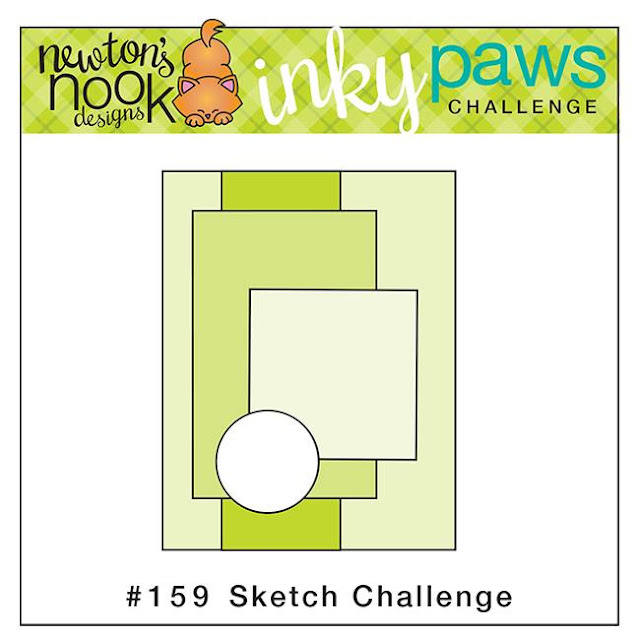
Inky Paws Challenge #159 - Sketch Challenge Reminder

  Hi everyone!  Here is an Inky Paws Challenge Reminder Post!  This is Inky Paws Challenge #159 - Sketch Challenge.  You have until Friday, October 22nd to get your entries in and have a chance to win a $20 store credit to Newton's Nook Designs online shop!  

Newton's Nook Designs Inky Paws Challenge - Sketch Challenge
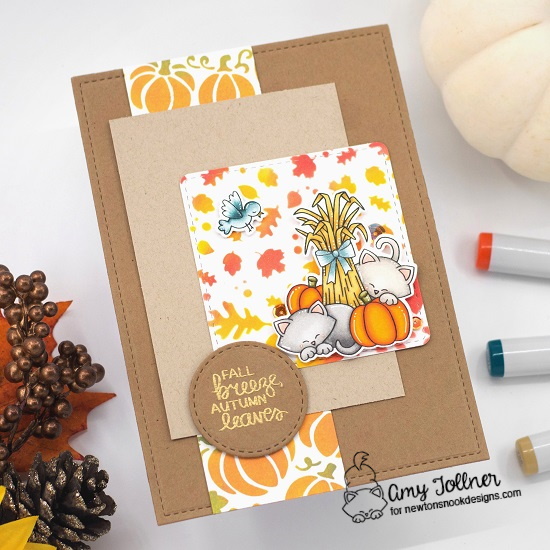
Autumn Newton Stamp and Die Set, Newton's Birdbath Stamp and Die Set, Falling Leaves Stencil, Pumpkin Patch Stencil, Frames Squared Die Set by Newton's Nook Designs #newtonsnook #handmade

To start this card I die cut a 5" x 7" cardbase out of paper bag cardstock.  I then cut a 2" x 7" strip out of smooth white cardstock on which I used the Pumpkin Patch Stencil with Distress Oxide Inks Spiced Marmalade and Peeled Paint.  Next, I cut a piece of kraft cardstock to 3" x 5".  I used the small stitched square die from the Frames Squared Die Set to cut a piece of smooth white cardstock on which I used the Falling Leaves Stencil with Distress Oxide Inks Mustard Seed and Barn Door.  
Autumn Newton Stamp and Die Set, Newton's Birdbath Stamp and Die Set, Falling Leaves Stencil, Pumpkin Patch Stencil, Frames Squared Die Set by Newton's Nook Designs #newtonsnook #handmade

Next, I stamped out this adorable image from the Autumn Newton Stamp Set, colored it with Copic markers, and cut it out with the coordinating die set.  The scene looked like it needed a little something, so I decided to add the bird from Newton's Birdbath Stamp Set, and cut it out with its coordinating die.  

For the sentiment, I used the largest stitched circle in the Frames Squared Die Set to cut a piece of paper bag cardstock.  I gold heat embossed the sentiment which is from the Autumn Newton Stamp Set

Autumn Newton Stamp and Die Set, Newton's Birdbath Stamp and Die Set, Falling Leaves Stencil, Pumpkin Patch Stencil, Frames Squared Die Set by Newton's Nook Designs #newtonsnook #handmade

I then adhered all of my layers together, using different thicknesses of foam tape to adhere the sentiment circle and images!

Autumn Newton Stamp and Die Set, Newton's Birdbath Stamp and Die Set, Falling Leaves Stencil, Pumpkin Patch Stencil, Frames Squared Die Set by Newton's Nook Designs #newtonsnook #handmade

For finishing touches on this card I added glitter with a glitter pen, accents with a white gel pen, and glossy accents to their cute noses!  Now it's time to get your paws inky creating a project for the Sketch Challenge using your Newton's Nook Designs products.  Be sure to link up to the Inky Paws Challenge!  Hope to see you there!

Monday, October 11, 2021

Inky Paws Challenge #159 - Sketch Challenge

 Hi everyone!  A new Inky Paws Challenge starts today!  This is Inky Paws Challenge #159 - Sketch Challenge.  You have until Friday, October 22nd to get your entries in and have a chance to win a $20 store credit to Newton's Nook Designs online shop! 

Newton's Nook Designs Inky Paws Challenge - Sketch Challenge

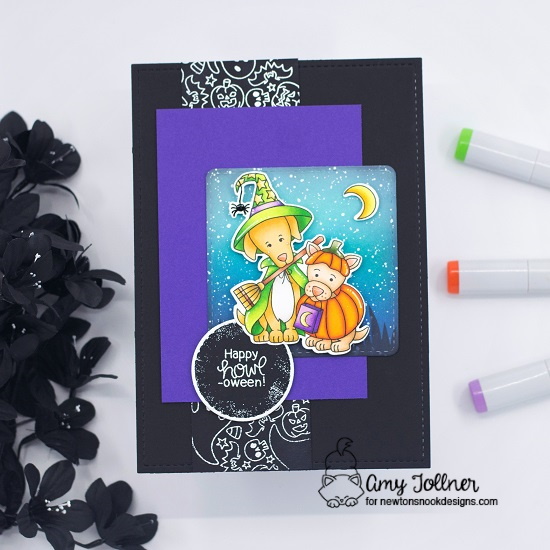
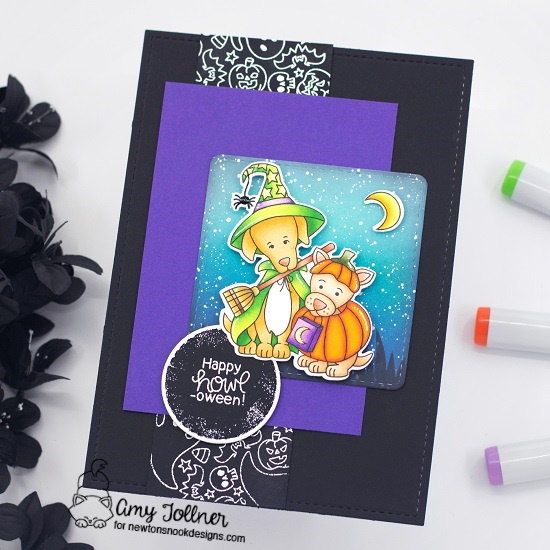
Happy Howl-oween Stamp and Die Set, Brooms & Boos Stamp and Die Set, Spooky Roundabout, Frames Squared Die Set, Hills & Grass Stencil by Newton's Nook Designs #newtonsnook #handmade

To start this card I die cut a 5" x 7" cardbase out of black cardstock.  I then cut a 2" x 7" black cardstock strip on which I stamped and white heat embossed images from the Spooky Roundabout Stamp Set.  Next, I cut a piece of purple cardstock to 3" x 5".  I used the small stitched square die from the Frames Squared Die Set to cut a piece of smooth white cardstock on which I blended Distress Oxide Inks Salvaged Patina, Peacock Feathers, and Prize Ribbon.  I then splattered my ink blended piece with white paint.  After the paint had dried, I decided to add some grass using the Hills & Grass Stencil and Black Soot Distress Oxide Ink.  

Happy Howl-oween Stamp and Die Set, Brooms & Boos Stamp and Die Set, Spooky Roundabout, Frames Squared Die Set, Hills & Grass Stencil by Newton's Nook Designs #newtonsnook #handmade

Next, I stamped out the super cute image from the Happy Howl-oween Stamp Set, colored it with Copic markers, and cut it out with the coordinating die set.  I then decided to add the moon, which is from the Brooms & Boos Stamp Set, and I cut it out with its coordinating die.  

For the sentiment, I used the largest stitched circle in the Frames Squared Die Set to cut a piece of black cardstock.  I white heat embossed the sentiment, from the Happy Howl-oween Stamp Set, and the edges of the circle as well.  

Happy Howl-oween Stamp and Die Set, Brooms & Boos Stamp and Die Set, Spooky Roundabout, Frames Squared Die Set, Hills & Grass Stencil by Newton's Nook Designs #newtonsnook #handmade

Next, I adhered all of my layers together, using different thicknesses of foam tape to adhere the sentiment circle and images!

Happy Howl-oween Stamp and Die Set, Brooms & Boos Stamp and Die Set, Spooky Roundabout, Frames Squared Die Set, Hills & Grass Stencil by Newton's Nook Designs #newtonsnook #handmade

For finishing touches on this card I added glitter with a glitter pen, accents with a white gel pen, and glossy accents to their cute noses!  Now it's time to get your paws inky creating a project for the Sketch Challenge using your Newton's Nook Designs products.  Be sure to link up to the Inky Paws Challenge!  Hope to see you there!

Sunday, October 10, 2021

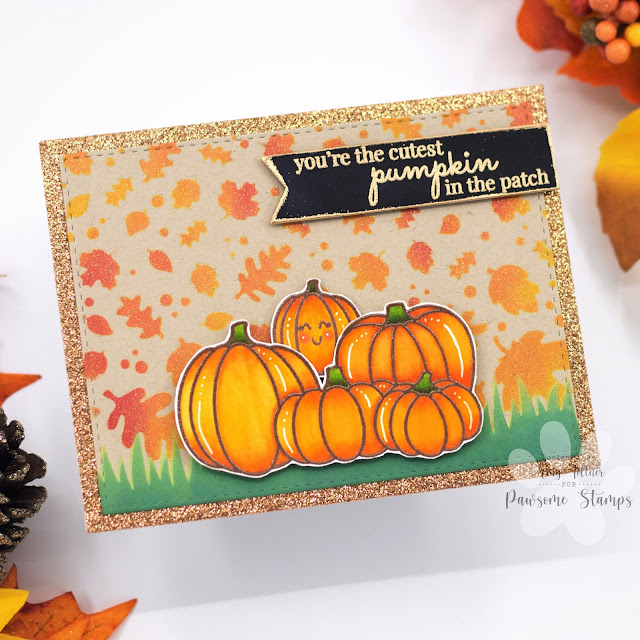
Cutest Pumpkin in the Patch

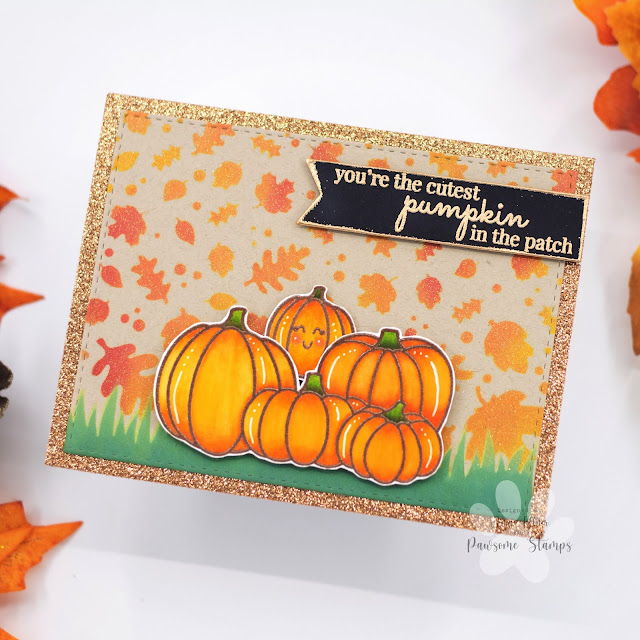
  Hi everyone!  I am up on the Pawsome Stamps blog today!  As soon as I saw the "you're the cutest pumpkin in the patch" sentiment in the Hey Pumpkin Stamp Set, this card came to mind and I had to create it!

Hey Pumpkin Stamp Set, Prickly Friends Stamp Set by Pawsome Stamps #pawsomestamps #handmade

To start this card I die cut a piece of Kraft cardstock to 5 1/4" by 4".  I used a leaf stencil with Distress Oxide Inks Mustard Seed, Spiced Marmalade, and Candied Apple, and a grass stencil with Twisted Citron, Mowed Lawn, and Rustic Wilderness to create a background.  I decided I wanted the leaves to sparkle so I replaced the leaf stencil and sprayed the background with gold glitter spray, trying to avoid the grass I already stenciled! 

Hey Pumpkin Stamp Set, Prickly Friends Stamp Set by Pawsome Stamps #pawsomestamps #handmade

I stamped out the pumpkin patch and a single pumpkin from the Hey Pumpkin Stamp Set in brown pigment ink and clear heat embossed.  On the single pumpkin I also stamped and heat embossed one of the faces from the Prickly Friends Stamp Set.  I colored all of the pumpkins with my Zigs, and fussy cut them out.

Next, I die cut a banner out of black cardstock on which I stamped and gold heat embossed the sentiment and the edges of the banner as well.  

Hey Pumpkin Stamp Set, Prickly Friends Stamp Set by Pawsome Stamps #pawsomestamps #handmade

I decided on a gold glitter cardbase and adhered my ink blended background with liquid glue.  I then adhered the pumpkins and sentiment banner with foam tape for some dimension!  

Hey Pumpkin Stamp Set, Prickly Friends Stamp Set by Pawsome Stamps #pawsomestamps #handmade

For finishing touches on this card I added accents with a white gel pen.  I didn't add any more glitter, because with the glitter cardbase and glitter leaves, the card was already nice and sparkly!  Thank you and I hope you enjoyed my card!  Be sure to stop by the Pawsome Stamps online shop to pick up your Hey Pumpkin Stamp Set today!

Monday, October 4, 2021

Inky Paws Challenge #158 - Color Challenge Reminder

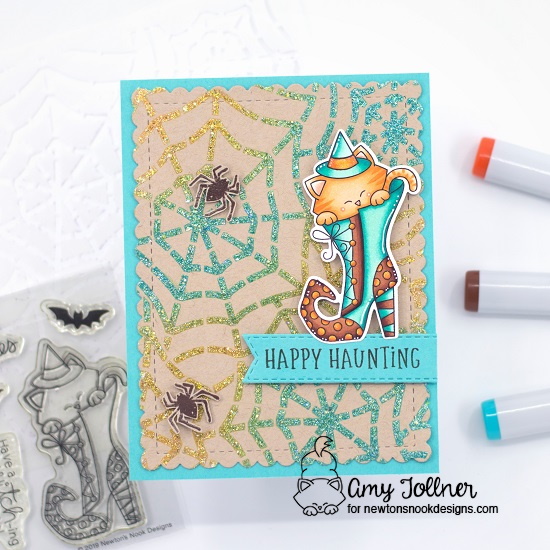
 Hi everyone!  This is an Inky Paws Challenge reminder post!  It is a Color Challenge, and the colors are Orange, Brown, Teal, and Kraft.  You have until Friday, October 8th to get your entries in and have a chance to win a $20 store credit to Newton's Nook Designs online shop!  

Newton's Nook Designs Inky Paws Challenge - Color Challenge

Witchy Newton Stamp and Die Set, Spooky Roundabout, Spooky Street Stamp Set, Spiderweb Stencil, Frames and Flags Die Set, Banner Trio Die Set by Newton's Nook Designs #newtonsnook #handmade

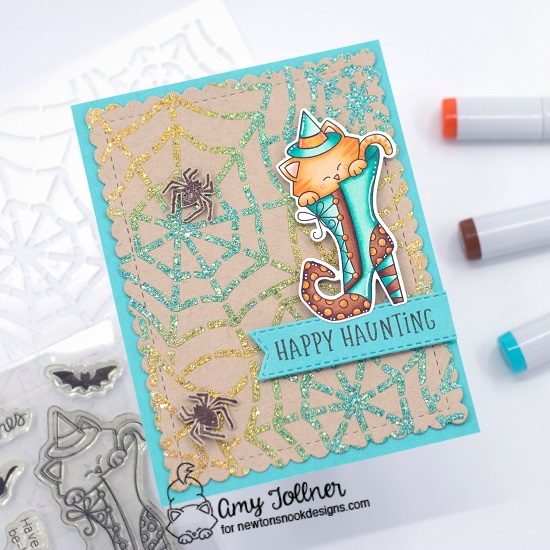
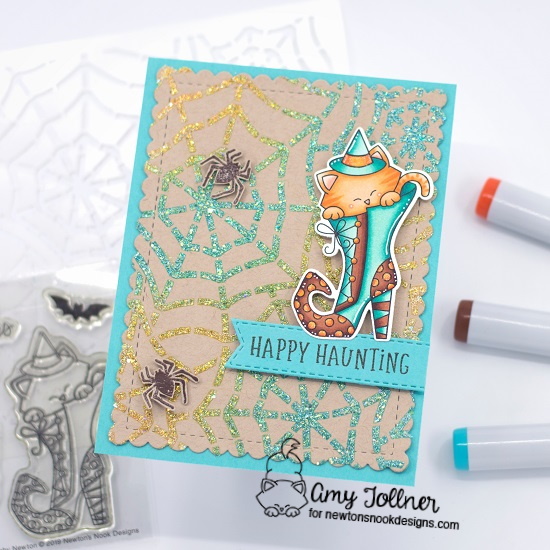
To start this card I cut a teal cardbase to A2 size.  I then die cut a piece of Kraft cardstock with the scalloped frame in the Frames and Flags Die Set.  I used the Spiderweb Stencil with Distress Oxide Inks Spiced Marmalade and Peacock Feathers.  Leaving the stencil in place, I applied a layer of glitter paste to give the spiderweb some sparkle!  

Witchy Newton Stamp and Die Set, Spooky Roundabout, Spooky Street Stamp Set, Spiderweb Stencil, Frames and Flags Die Set, Banner Trio Die Set by Newton's Nook Designs #newtonsnook #handmade

Next, I stamped out one of my favorite Halloween images, Witchy Newton!  I colored the image with Copic markers, and cut it out with the coordinating die set.  I stamped a couple of spider images from the Spooky Street Stamp Set in brown pigment ink on Kraft cardstock, clear heat embossed them, and fussy cut them out.  

Witchy Newton Stamp and Die Set, Spooky Roundabout, Spooky Street Stamp Set, Spiderweb Stencil, Frames and Flags Die Set, Banner Trio Die Set by Newton's Nook Designs #newtonsnook #handmade

I used the stitched fishtail banner in the Banner Trio Die Set to cut a piece of teal cardstock for my sentiment.  I stamped the sentiment, which is from the Spooky Roundabout, in brown pigment ink and clear heat embossed for some shine!  I then adhered all of my images with foam tape for some dimension!  

Witchy Newton Stamp and Die Set, Spooky Roundabout, Spooky Street Stamp Set, Spiderweb Stencil, Frames and Flags Die Set, Banner Trio Die Set by Newton's Nook Designs #newtonsnook #handmade

For finishing touches on this card I added white gel pen accents, glitter with a glitter pen, and glossy accents to Newton's cute little nose!  Now it's time to get your paws inky creating a project for the Color Challenge using your Newton's Nook Designs products.  Be sure to link up to the Inky Paws Challenge!  Hope to see you there!