Wednesday, July 29, 2020

Newton's Purr-fect Birthday Slimline Card

Hello everyone!  Today I am sharing a card I made for Newton's Nook Designs Inky Paws Challenge #128 - Color Challenge.  The colors are Red, Pink, Orange, and Yellow.  I am also entering this card into Simon Says Stamp Wednesday Challenge - Anything Goes.


I started my background pieces by blending Distress Oxide Inks Squeezed Lemonade and Spun Sugar.  Those two colors blend together nicely making a pretty light orange color!  I then used Newton's Nook Designs Balloons stencil with Mustard Seed and Worn Lipstick Distress Oxide Inks.  Next, I die cut a piece of pink glitter card stock using NND Slimline Frames and Windows die.  I attached my ink blended panel to a piece of pink glitter card stock for a border, and then attached the pink glitter windows to the ink blended panel with foam tape for some dimension.

After completing the background, I stamped out these super cute Newton images from Newton's Birthday Bash and Newton Loves Cake stamp sets.  I colored all the pieces with Copic markers then die cut them out with their coordinating dies.  After figuring out the placement for each piece, I stamped the sentiments with black pigment ink, then adhered the Newtons with liquid glue and foam tape.  I used a double layer of foam tape for the center Newton with the balloon to give him some extra lift!  


Copic Colors used for Newtons:
  • Y35, Y17, YR15, YR16 - for stripes
  • Shadow for white fur on chest - N0, N1
  • Ears - R20, R32, R43
  • Noses - R20
Red:
  • R05, R24, R29, R39
Pink:
  • RV10, RV13, RV14
  • RV0000, RV00, RV02
Orange:
  • Y17, YR04, YR07
Yellow:
  • Y0000, Y00, Y02, Y06

For finishing touches I used a glitter pen for some sparkle and glossy accents for some shine!  I also added some crystals for more bling!  Thank you and I hope you enjoyed my card today!

Tuesday, July 28, 2020

House Mouse Designs - #1 Teacher

Hi everyone!  I created this card for the House Mouse and Friends Monday Challenge #321 - Anything Goes with the option of Use a Number.  


I started by die cutting the patterned paper with the largest stitched square from Newton's Nook Designs Frames Squared die set.  I then die cut a piece of Copic friendly white paper with a smaller stitched square from the same die set.  I stamped the image from the House Mouse Designs Everyday Mini Set and colored it with Copic markers.  Then, I stamped the sentiment with brown pigment ink and clear heat embossed it for a shiny look!  


Copic Colors used for Mouse:
  • Fur - E53, E35, E57
  • Skin - E50, E51
  • Ear, Nose, Cheek - E93
Pencil:
  • B00, B02, B05
  • C0, C1, C3, C6
  • R20, R32, R43, R35
  • E50, E51, E53
Eraser:
  • R81, R83, R85
Paperclip:
  • YG01, YG06, YG17
Shadow:
  • N0, N1, N3, N5
After coloring, I mounted my colored piece and the patterned piece onto solid paper.  I used a corner chomper to round the edges.


For finishing touches I used a glitter pen for some sparkle and glossy accents for some shine!  I also added a few red crystals to match the apple patterned paper!  Thank you and I hope you enjoyed this card!

Newton's Block Party - Time to Paw-ty!

Hi everyone!  Today I am sharing a card I made for Newton's Nook Designs Inky Paws Challenge #128 - Color Challenge.  The colors are Red, Pink, Orange, and Yellow.


I started off by using the largest stitched square in Newton's Nook Designs Framed Squared die set to die cut the pink glitter piece.  I then used the scalloped square from the same die set to cut out the yellow glitter piece.  Next, I stamped the image from NND Newton's Block Party on Copic friendly white paper and colored it with Copic markers.  I stamped the sentiment with black pigment ink and clear heat embossed it for a shiny look!  


Copic Colors used for Orange Newtons:
  • Y35, Y17, YR15, YR16 - for stripes
  • Bellies and Hair - Y19, Y17, YR15
White Newtons Shadows:
  • C0, C1
Newtons Ears and Noses:
  • R00, R11, R20
  • R20, R32, R43
  • R81, R83, R85
Red:
  • R05, R29, R39
Pink:
  • RV10, RV13, RV14
Orange:
  • Y17, YR04, YR07
Yellow:
  • Y000, Y02, Y06, Y08

I finished off this card by adding glitter with a glitter pen and glossy accents.  I used glitter Stickles for the tags on the kitties' collars, and added some pink and yellow crystals for extra bling!  I hope you enjoyed my card today!

Wednesday, July 22, 2020

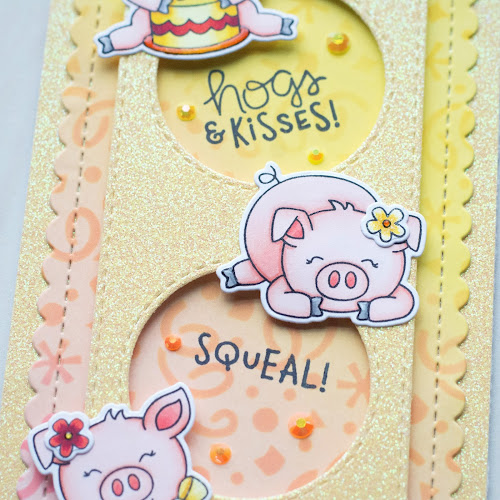
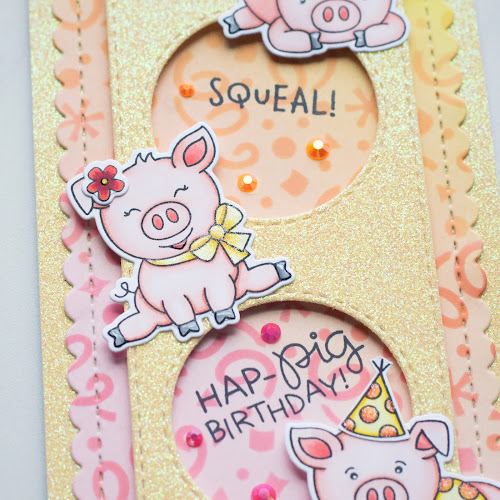
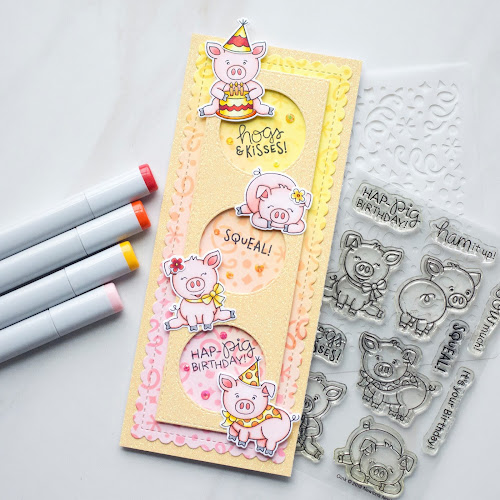
Hap-pig Birthday Slimline Card

Hi everyone!  Today I am sharing a card I created for Newton's Nook Designs Inky Paws Challenge #128 - Color Challenge.  The colors are Red, Pink, Orange and Yellow. 


I started my background pieces by blending Distress Oxide Inks Squeezed Lemonade and Spun Sugar onto an 8.5" by 3.5" piece of cardstock.  Blending the two colors together will create a nice light orange color!  I then used Newton's Nook Designs Confetti stencil with Mustard Seed and Worn Lipstick Distress Oxides Inks.  Next, I die cut my ink blended panel with the scalloped edge die, and die cut a piece of yellow glitter paper with the portholes die, both from NND Frames and Portholes die set.  I attached my ink blended panel to yellow glitter paper with liquid glue, and attached the portholes panel to my ink blended panel with foam tape for some dimension.  

With the background pieces complete, I stamped out the adorable pigs from NND Oink stamp set, the scalloped party hat from Newton's Birthday Bash stamp set, the polka dot party hat from the Stamptember Let's Pawty stamp set, and the flowers from the Woodland Spring stamp set.  I colored all of the pieces with Copic markers then die cut them out with their coordinating dies, with the exception of the polka dot party hat, which I fussy cut.  After figuring out where I wanted to place each pig, I stamped the sentiments with black pigment ink, and adhered the pigs in place with liquid glue.  


Copic Colors used for Pigs:
  • R000, R00, R11, R20
  • Nose, Ears, Mouth - R20, R32, R22
  • Hooves - N1, N2, N3 
Red:
  • R05, R24, R29, R39
Orange:
  • Y17, YR04, YR07
Yellow:
  • Y000, Y02, Y08, Y19

I finished up this card using a white gel pen on the pig's eyes, a glitter pen for some sparkle, and glossy accents for some shine!  I also added a few color coordinating crystals for more bling!  I hope you all enjoyed my card today.  I just love this stamp set!  The pigs are so cute!!  

Wednesday, July 15, 2020

Floral and Monarch Slimline Card

Hi everyone!  This is my second post for today.  I am sharing another card I made for Newton's Nook Designs Inky Paws Challenge #127 - Summer Theme.  


I started by die cutting my background pieces from the awesome new Newton's Nook Designs Slimline Frames and Portholes die set.  I ran the portholes die through my die cutting machine once with Copic friendly white paper to get the white circles, and then again with the blue glitter paper.  I randomly stamped the white circles using the gorgeous NND Floral Roundabout stamp.  I wanted to have beautiful butterflies fluttering their wings on the card, so using the NND Monarchs stamp set, I stamped out each butterfly twice with dye ink, leaving the stamp in place in my stamp positioning tool.  I colored the floral circles and the butterflies all with Copic Markers.  

 
Copic Colors used for Flowers:
  • Y00, Y02, Y08, Y19
  • RV10, RV13, RV14, RV25
  • V01, V12, V04, V17
  • B000, B01, B02, B04
  • BG11, BG23, BG15
Leaves:
  • YG01, YG03, YG17, YG67
  • G21, G24, G94, G99
Butterflies:
  • Y08, Y17, YR04, YR16, YR07, YR09
After all of the butterflies were colored, I re-stamped each one with black pigment ink and heat embossed them with clear embossing powder.  That way I was able to get a great contrast with the pigment ink being so dark, and was also able to make them shine!  I then cut them out with the coordinating die set.  I adhered the first layer of butterflies to my card with foam tape, then glued only the bodies of the second butterflies on top, gently bending their wings upward.  I used a sentiment from the Monarchs stamp set on a banner from the NND Frames and Flags die set.  I stamped the sentiment in black pigment ink and heat embossed with clear embossing powder.  I inked the edges of the banner with Distress Oxide Ink Mermaid Lagoon.


I finished off this card by using different colored sparkling Stickles for the flower centers and berries!  I hope you enjoyed this card!  I really enjoyed making it, and am so happy I was able to share it with you today!  

House Mouse Designs Monica and Teddy

Hello everyone!  Today I am sharing a card I created for the House Mouse and Friends Monday Challenge #320 - Anything Goes with the option of Stitching (real or faux).


I started by die cutting the largest of the Wonky Stitched Ovals from My Favorite Things out of white Copic friendly paper.  I then stamped the House Mouse Designs stamp, Teddy Friend, in the oval.  I used the largest of the Simon Says Stamp Stitched Rectangles to die cut the patterned paper.  Then, I colored this adorable image with Copic markers.  There is a coloring tutorial tab on the House Mouse and Friends Monday Challenge page, which is super awesome and helpful!  I definitely recommend checking it out!


Copic Colors used for Monica:
  • Fur - T1, T3, T5
  • Skin - E50, E51 
  • Ears, Nose, and Cheeks - E93
Teddy:
  • E31, E33, E35, E37
  • Ears - E93
  • Bow - B21, B12, B34, B45
Shadows:
  • N0, N1, N2, N3
For finishing touches on this card I added the flower, leaves, and a few sequins.  I also used a white gel pen on Teddy's eyes, gave him a glitter bow, and used glossy accents on both Monica and Teddy's noses!  I love coloring House Mouse Designs.  They are just so cute!

Tuesday, July 14, 2020

Winston's Lemonade Stand

Hi everyone!  Today I wanted to share a cute card I made for Newton's Nook Designs Inky Paws Challenge #127 - Summer Theme.  


I started by die cutting all of the background pieces and inking them with Distress Oxide Inks.  I used the large scalloped rectangle die from Newton's Nook Designs Flags and Frames die set.  I then inked it with Tumbled Glass and Peacock Feathers.  I die cut the grass with NND Land Borders die, and inked it with Twisted Citron and Mowed Lawn.  Next, I used NND Sky Scene Builder and die cut the sun.  I used Dried Marigold and Spiced Marmalade for the center, and Squeezed Lemonade for the rays.  After getting everything cut out and inked up, I used NND Cloudy Sky stencil with glitter paste.  

After completing my background pieces, I stamped out images from the now retired, Freshly Squeezed stamp set, and colored them with Copic markers.  I fussy cut the images out, which I am TERRIBLE at doing!  You will definitely be able to see my mistakes with the scissors!  I made little slits by Winston's hands so I could tuck that lemon slice behind them and make it look like he is really holding it.  


Copic Colors used for Winston:
  • E13, E15, E25, E29
  • E31, E33, E35
  • Ears - R81, R83, R85
  • Nose - N8, N9
Lemonade Stand:
  • Y21, YR23, E34
  • RV000, RV00, RV02
  • Y000, Y00, Y02
  • B000, B00, B01
  • Cups - BG11, BG23, BG13
    • V01, V12, V04
  • Lemons - Y00, Y02, Y08, Y19
  • Basket - YG01, YG03, YG06
Bunny:
  • W0, W1
  • Ears - R81, R83, R85
  • Nose - R81
  • Pitcher - C0
  • Lemonade - Y000, Y00
  • Lemons - Y02, Y08, Y19

I don't know the exact colors I used on the flowers and butterflies because they were left over pieces I had from previous projects.  I finished off this card by adding white gel pen to Winston's eyes, glitter with a glitter pen for some sparkle, and glossy accents for some shine!  Despite my fussy cutting mistakes, I just love how cute Winston is selling his lemonade!  I hope you all enjoyed my card today!

Wednesday, July 8, 2020

Newton's Summer Vacation

Hi everyone!  For my first blog post I wanted to share a fun and colorful card I created for Newton's Nook Designs Inky Paws Challenge #127 - Summer Theme.  


I started my background by blending Distress Oxide Inks Squeezed Lemonade and Mustard Seed.  I then sprayed it with gold shimmer spray and set it aside to dry.  As the spray was drying, I cut out waves with NND Sea Borders dies and inked them up with Tumbled Glass, Salty Ocean, and Mermaid Lagoon.  I spritzed some water on the waves and set them aside to dry as well.  I then cut out sand from gold glitter paper using NND Land Borders die.  After the gold shimmer spray was dry, I used NND Sunscape Stencil with Distress Oxide Inks Spiced Marmalade, Dried Marigold, and Mustard Seed.  I stamped the sentiment with brown pigment ink and used clear embossing powder over it for a shiny look! 

With all of the background pieces complete, I stamped out images from Newton's Summer Vacation stamp set and a few fish from the Scuba Newton stamp set.  I colored them with Copic markers and die cut them out with their coordinating die sets.  


Copic colors used:
  • Purple - V01, V12, V04
  • Pink - RV10, RV13, RV14
  • Green - YG01, YG03, YG06
  • Blue - B01, B02, B04, B06
  • Brown - E31, E33, E35, E23
Gray Newton:
  • C0, C1, C2, C3 - for stripes
  • Belly - C0, C1
  • Ears - R20, R32, R43
  • Nose - R20
Orange Newton:
  • Y35, Y17, YR15, YR16
  • Ears - R20, R32, R43
  • Nose - R32
Buff Newton:
  • YR0000, YR000, YR20, YR31 - for stripes
  • Belly - W0, W1
  • Sunglasses - C0, C1, C3
  • Ears - R20, R32, R43
  • Nose - R20


I finished this fun-loving kitty card off by adding gold glitter paste to the sand castle, to the area around the castle, and to the sand in the pail.  I also used a glitter pen for even more sparkle and glossy accents for some shine!  Thank you and I hope you enjoyed my card today!