Showing posts with label Slimline card. Show all posts

Wednesday, December 14, 2022

Christmas Cactus

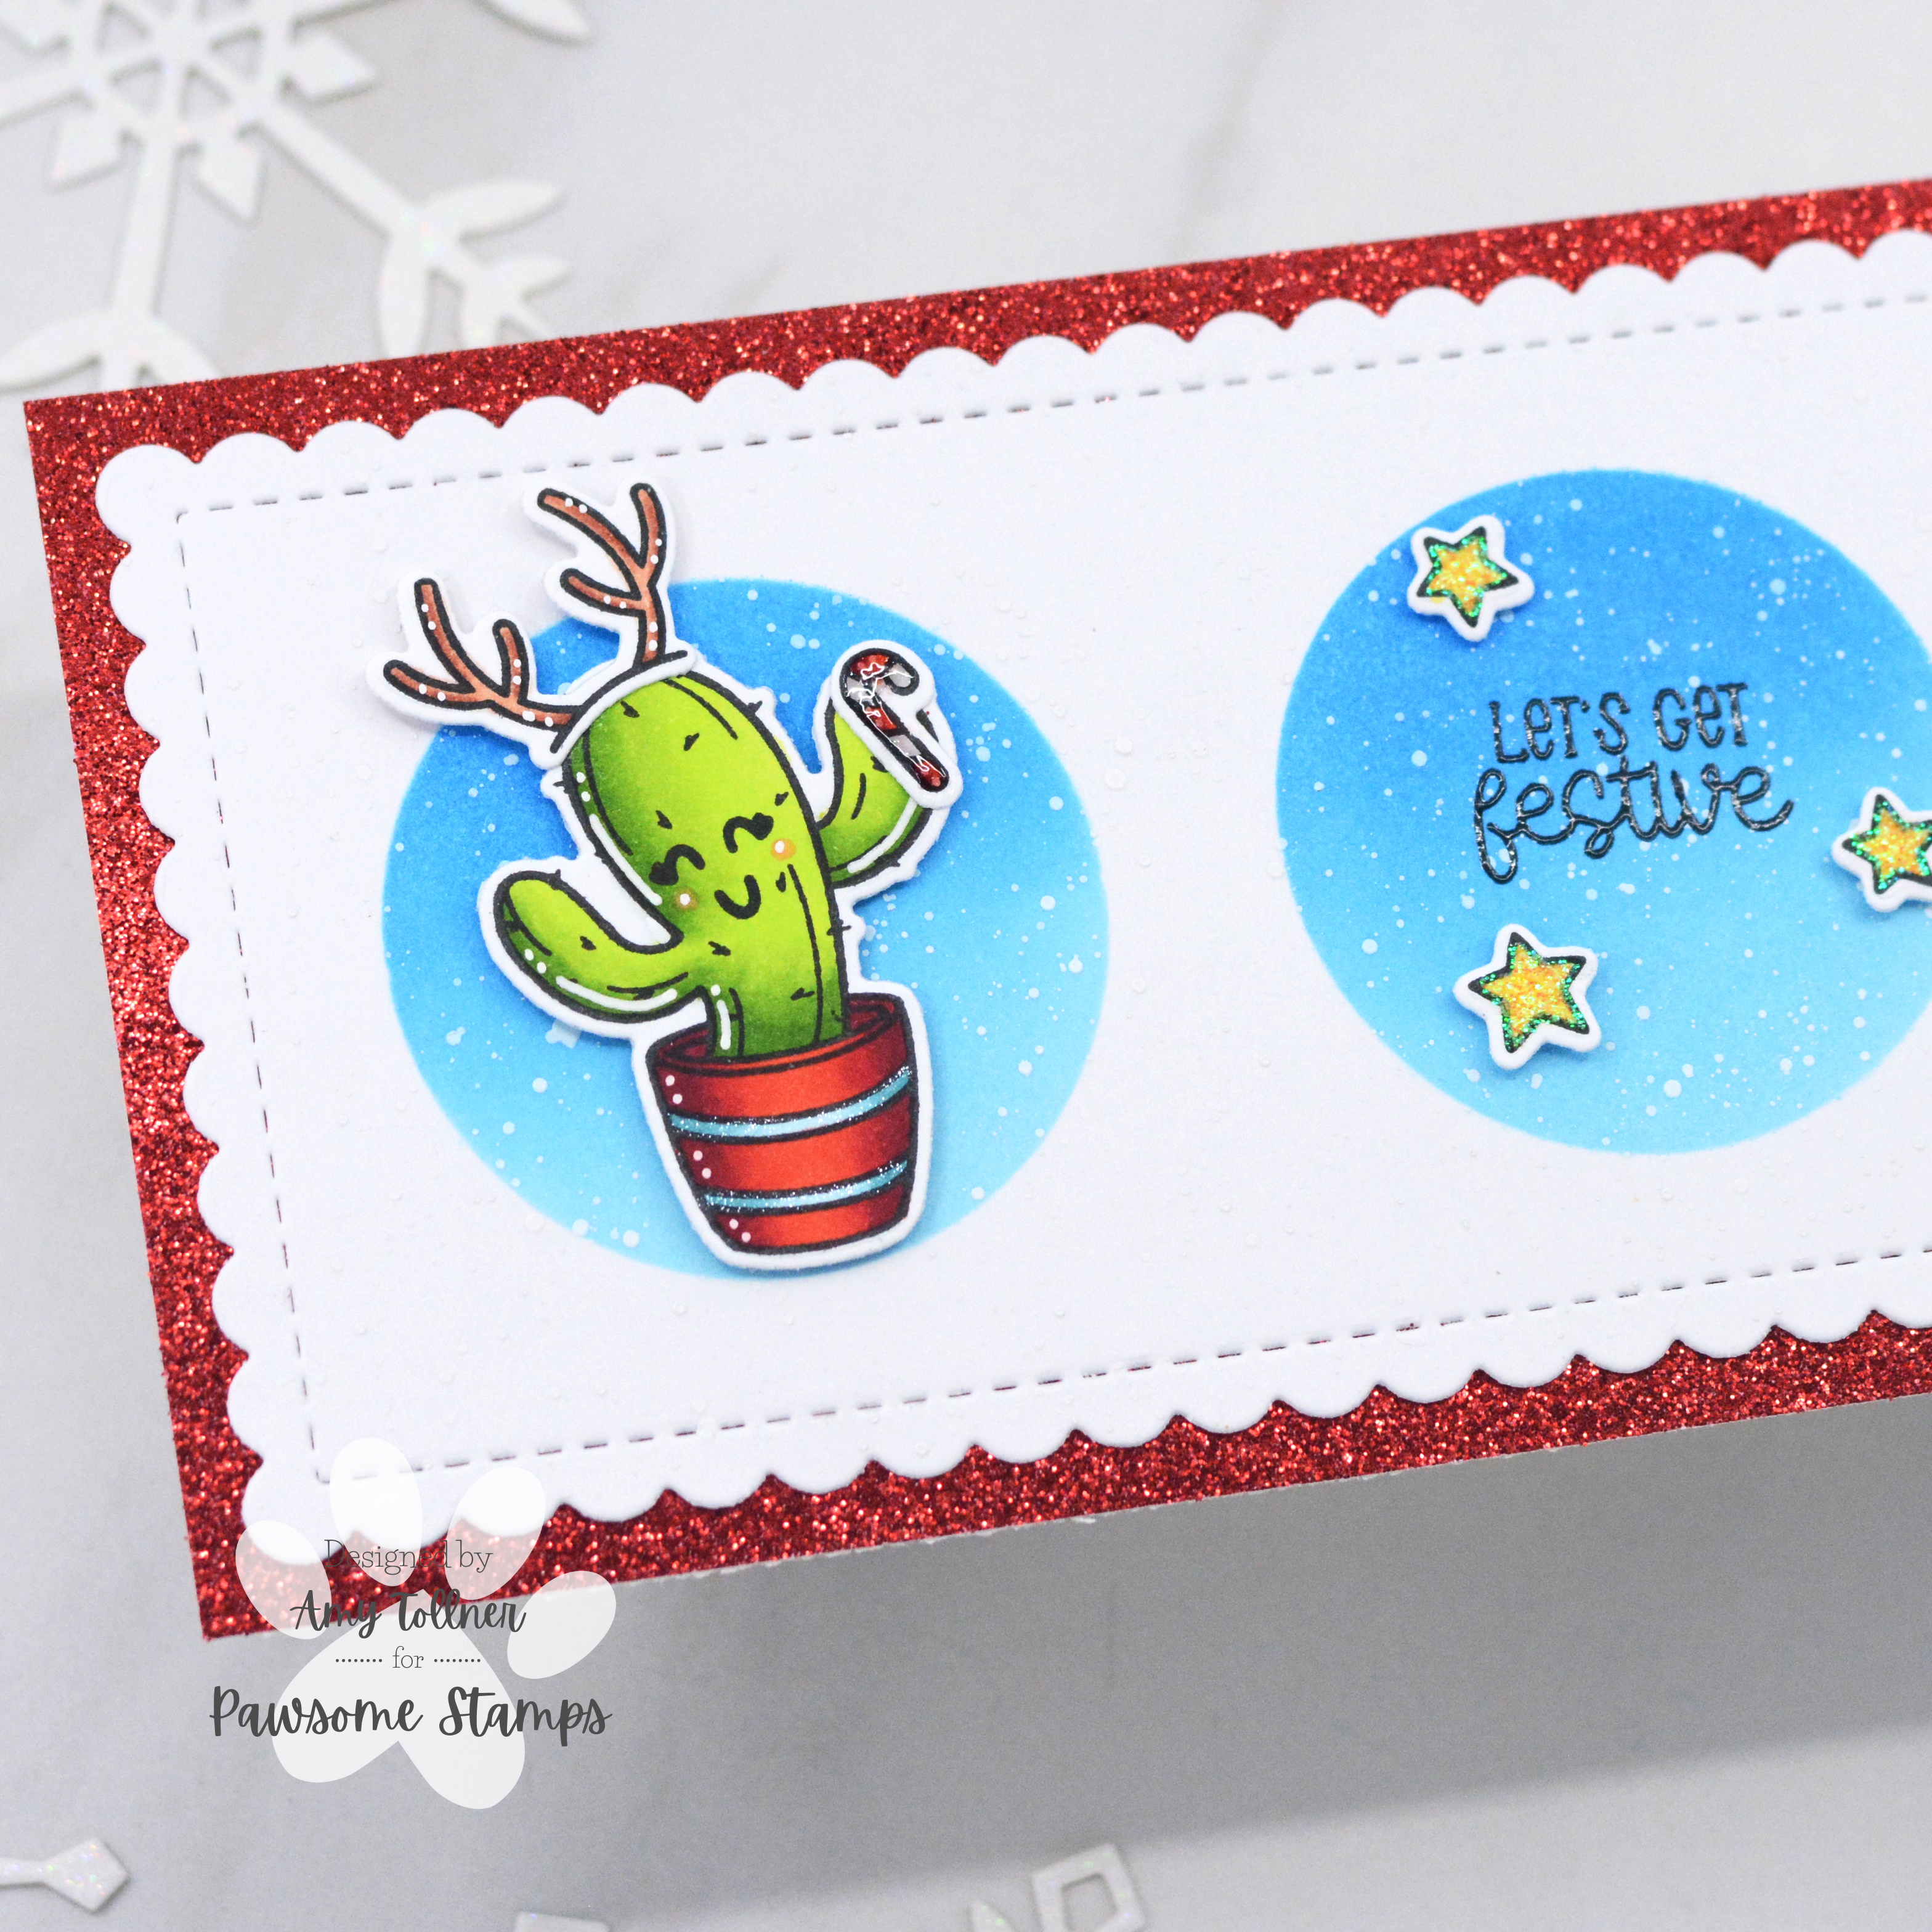
  Hi everyone!  I'm up on the Pawsome Stamps blog today sharing this Christmas card I created using the Prickly Friend Stamp Set!  

Prickly Friend Stamp and Die Set, Ugly Sweater Stamp and Die Set, Gingerbread Lane Stamp and Die Set by Pawsome Stamps #pawsomestamps #handmade

I started this card by die cutting a piece of smooth white cardstock to slimline size.  Using a masking stencil, I blended on Distress Oxide Inks Salty Ocean and Tumbled Glass.  I then splattered the background with white paint and set it aside to dry.

Next, I stamped out the cactus images from the Prickly Friend Stamp Set, and accessories from the Ugly Sweater and Gingerbread Lane Stamp Sets.  I colored all of the images with copic markers and die cut them out using the coordinating die sets.
Prickly Friend Stamp and Die Set, Ugly Sweater Stamp and Die Set, Gingerbread Lane Stamp and Die Set by Pawsome Stamps #pawsomestamps #handmade

Prickly Friend Stamp and Die Set, Ugly Sweater Stamp and Die Set, Gingerbread Lane Stamp and Die Set by Pawsome Stamps #pawsomestamps #handmade

I stamped the sentiment, which is from the Ugly Sweater Stamp Set, directly onto the background in the center circle.  I stamped it in black pigment ink and clear heat embossed for some shine!

I assembled my card using red glitter cardstock for the base, and foam tape to pop up the images for some dimension!

Prickly Friend Stamp and Die Set, Ugly Sweater Stamp and Die Set, Gingerbread Lane Stamp and Die Set by Pawsome Stamps #pawsomestamps #handmade

For finishing touches on this card I added accents with a white gel pen, glitter, and glossy accents.  Thank you and I hope you enjoyed my card today!  Be sure to visit the Pawsome Stamps online shop to pick up your favorite new stamp sets today!

Saturday, July 9, 2022

Christmas in July - From our Home to Yours

  Hi everyone!  I am up on the Pawsome Stamps blog today with this Christmas in July card I created by combining the Cup of Tea and Tweet Birdie Stamp Sets!  

Cup of Tea Stamp and Die Set, Tweet Birdie Stamp and Die Set, Gingerbread Lane Stamp Set, Snowflake Flurries Stencil by Pawsome Stamps #pawsomestamps #handmade

To start this card I die cut a piece of smooth white cardstock with a scalloped slimline die.  I blended on Distress Oxide Inks Salty Ocean and Tumbled Glass then splattered the background with white paint.  After the paint had dried, I used the beautiful Snowflake Flurries Stencil with glitter paste to create a sparkling, snowy background!  I then die cut white glitter paper to create snowy hills!

Next, I stamped out these gorgeous images from the Cup of Tea and Tweet Birdie Stamps Sets, colored them with Copic markers, and die cut them using their coordinating die sets.  

Cup of Tea Stamp and Die Set, Tweet Birdie Stamp and Die Set, Gingerbread Lane Stamp Set, Snowflake Flurries Stencil by Pawsome Stamps #pawsomestamps #handmade

Using a fishtail banner die, I die cut a sentiment banner out of dark blue cardstock, stamped the sentiment, which is from the Gingerbread Lane Stamp Set, and white heat embossed.  

I assembled my card using dark blue cardstock for the base, and foam tape to pop up the images and sentiment banner for some dimension!  

Cup of Tea Stamp and Die Set, Tweet Birdie Stamp and Die Set, Gingerbread Lane Stamp Set, Snowflake Flurries Stencil by Pawsome Stamps #pawsomestamps #handmade

For finishing touches on this card I added accents with a white gel pen, and glitter to the leaves and birdhouse!  Thank you and I hope you enjoyed my card today!  Be sure to visit the Pawsome Stamps online shop and pick up your new favorite stamp sets today!

Friday, March 4, 2022

Hang In There Slimline Card

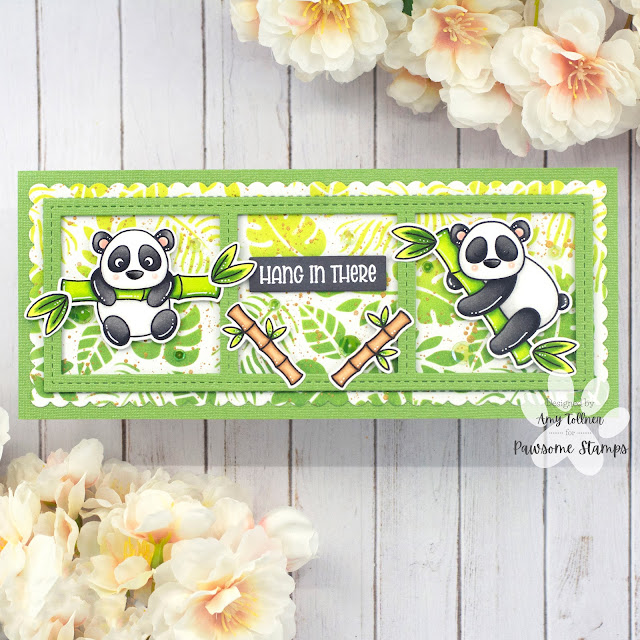
  Hi everyone!  I am up on the Pawsome Stamps blog today with this slimline card I created using the Playful Pandas Stamp Set!  It is a great card for anyone who needs a little encouragement!

Playful Pandas Stamp and Die Set, Captivating Cactus Sequin Mix by Pawsome Stamps #pawsomestamps #handmade

I started this card by cutting a green slimline cardbase and windows.  I then die cut a piece of smooth white cardstock for the background, and used a leaf stencil with Distress Oxide Inks Twisted Citron, Mowed Lawn, and Rustic Wilderness.  I splattered the ink blended background with gold watercolor paint and set it aside to dry.  

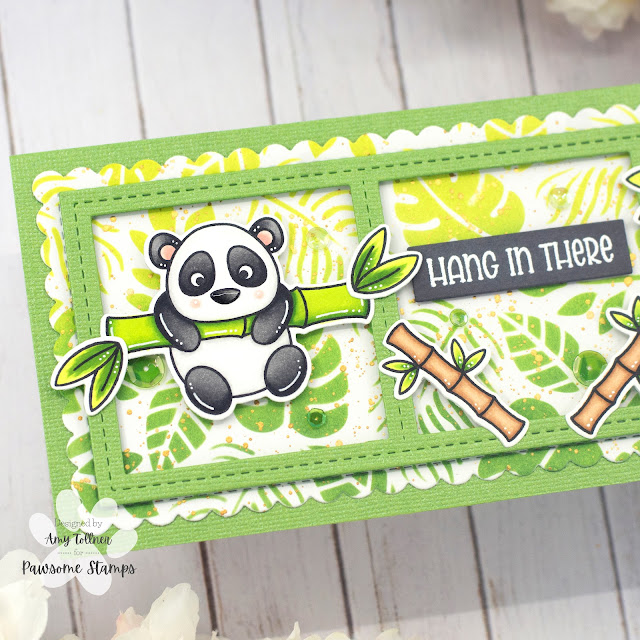
Playful Pandas Stamp and Die Set, Captivating Cactus Sequin Mix by Pawsome Stamps #pawsomestamps #handmade

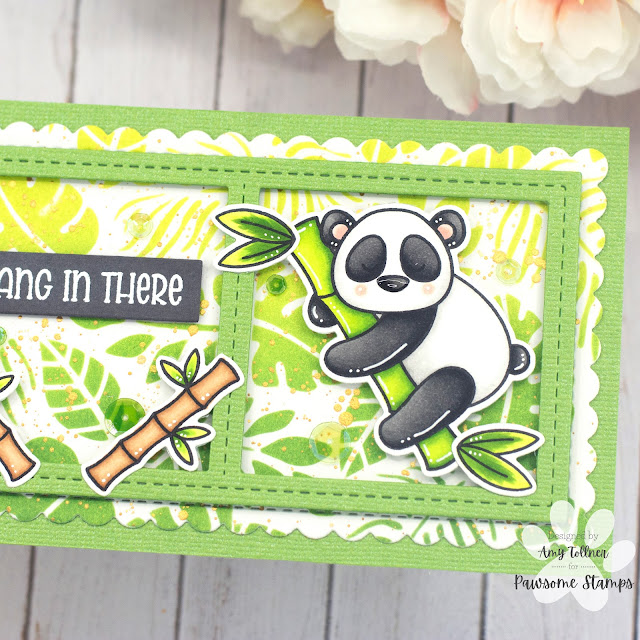
Next, I stamped out these adorable pandas from the Playful Pandas Stamp Set, colored them with Copic markers, and cut them out with the coordinating die set.  I also stamped and colored some leaves and a couple of extra bamboo pieces.  

Playful Pandas Stamp and Die Set, Captivating Cactus Sequin Mix by Pawsome Stamps #pawsomestamps #handmade

I stamped and white heat embossed the sentiment, which is from the Playful Pandas Stamp Set, onto dark gray cardstock.  

I assembled my card adhering the leafy background to the cardbase, and popping up the windows, sentiment strip, and images with foam tape for some dimension!

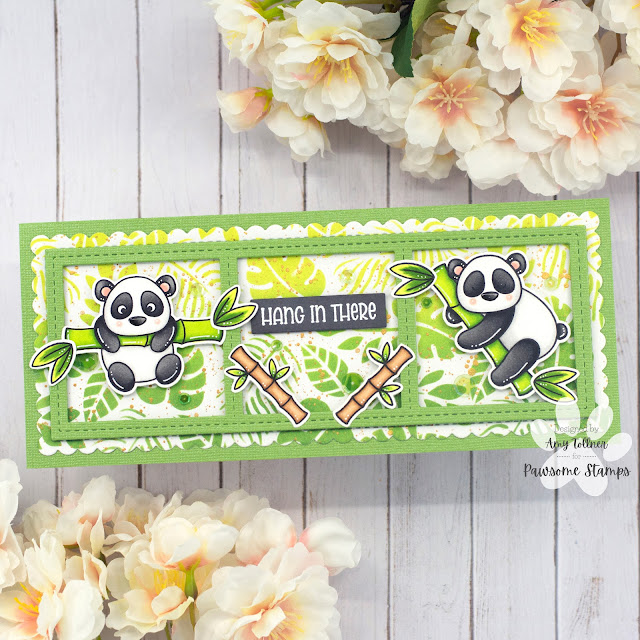
Playful Pandas Stamp and Die Set, Captivating Cactus Sequin Mix by Pawsome Stamps #pawsomestamps #handmade

For finishing touches on this card I added accents with a white gel pen, glossy accents to their noses, and a few sparkling sequins from the Captivating Cactus Sequin Mix!  Thank you and I hope you enjoyed my card!  Head on over to the Pawsome Stamps online shop to pick up your Playful Pandas Stamp Set today!

Thursday, October 28, 2021

Silver Bells Slimline Card and Pawsome Stamps October Release!

 Hi everyone!  Pawsome Stamps October Release is here!  Head on over to the Pawsome Stamps website to pick up all your new faves!  We are also having an Instagram Hop today so be sure to join in the fun to win some awesome prizes!  I love the new Special Delivery Stamp Set!  As soon as I saw the bells on the stamps, I knew I wanted to create a card like this!  

Special Delivery Stamp and Die Set, Just Sentiments: Christmas Stamp Set by Pawsome Stamps #pawsomestamps #handmade

I started this card by cutting a cardbase to slimline size from dark blue cardstock.  I used the same cardstock to die cut the windows, and I used a scalloped frame die to cut the silver glitter cardstock. 

Special Delivery Stamp and Die Set, Just Sentiments: Christmas Stamp Set by Pawsome Stamps #pawsomestamps #handmade

I then stamped out the beautiful bell stamp and holly two times from the Special Delivery Stamp Set.  I colored them with Copic markers, and fussy cut them out.  There is a coordinating die set available!  

Next, I stamped a sentiment from the new Just Sentiments: Christmas Stamp Set onto the dark blue cardstock and white heat embossed.  I fussy cut around the sentiment so it would fit perfectly in the middle window.  

Special Delivery Stamp and Die Set, Just Sentiments: Christmas Stamp Set by Pawsome Stamps #pawsomestamps #handmade

Special Delivery Stamp and Die Set, Just Sentiments: Christmas Stamp Set by Pawsome Stamps #pawsomestamps #handmade

With all of my pieces ready, it was time to assemble my card!  I adhered the silver glitter cardstock to my cardbase, and used thin foam tape to adhere the windows to the glitter cardstock.  I then used foam tape to adhere all of my images and the sentiment for some more dimension!

Special Delivery Stamp and Die Set, Just Sentiments: Christmas Stamp Set by Pawsome Stamps #pawsomestamps #handmade

For a finishing touch on this card I added accents with a white gel pen.  I hope you enjoyed my card today!  Don't forget to join in the fun of the IG Hop to win some great prizes!  Get your Special Delivery Stamp and Die Set, and Just Sentiments: Christmas Stamp Set on the Pawsome Stamps website today!

Wednesday, September 29, 2021

Colorful Slimline Coffee Card

 Hi everyone!  I am up on the Pawsome Stamps blog today with a colorful slimline card for National Coffee Day!  I LOVE coffee so I am so excited to be sharing this card with you today!

Coffee Besties Stamp and Die Set, Dreamy Days Sequin Mix by Pawsome Stamps #pawsomestamps #handmade

To start this card I die cut a piece of smooth white cardstock and blended Distress Oxide Inks Squeezed Lemonade, Kitsch Flamingo, Shaded Lilac, and Salvaged Patina for the background.  I then splattered the background with silver watercolor paint and set it aside to dry.  

I stamped out my images, all from the Coffee Besties Stamp Set, colored them with Copic markers, and cut them out with their coordinating die set.  

Coffee Besties Stamp and Die Set, Dreamy Days Sequin Mix by Pawsome Stamps #pawsomestamps #handmade

After my background was dry, I stamped the sentiment, also from the Coffee Besties Stamp Set, in black pigment ink and clear heat embossed.  I then adhered all of my images to the card with foam tape for some dimension!  Here are a few close-ups!

Coffee Besties Stamp and Die Set, Dreamy Days Sequin Mix by Pawsome Stamps #pawsomestamps #handmade

Coffee Besties Stamp and Die Set, Dreamy Days Sequin Mix by Pawsome Stamps #pawsomestamps #handmade

Coffee Besties Stamp and Die Set, Dreamy Days Sequin Mix by Pawsome Stamps #pawsomestamps #handmade

For finishing touches on this card I added glitter with a glitter pen, white gel pen accents, and a few sparkling sequins from the Dreamy Days Sequin Mix!

Coffee Besties Stamp and Die Set, Dreamy Days Sequin Mix by Pawsome Stamps #pawsomestamps #handmade

Thank you and I hope you all enjoy National Coffee Day!  Visit the Pawsome Stamps website to pick up your Coffee Besties Stamp Set today!

Monday, September 27, 2021

Inky Paws Challenge #158 - Color Challenge

 Hi everybody!  A new Inky Paws Challenge starts today!  It is a Color Challenge.  The colors are Orange, Brown, Teal, and Kraft.  You have until Friday, October 8th to get your entries in and have a chance to win a $20 store credit to Newton's Nook Designs online shop!  This is such a great Fall color combo, and I am so excited to use it!

Newton's Nook Designs Inky Paws Challenge - Color Challenge

Autumn Mice Stamp and Die Set, Falling Leaves Stencil, Slimline Frames and Portholes Die Set, Slimline Frames and Windows Die Set by Newton's Nook Designs #newtonsnook #handmade

To start this card I cut a piece of teal cardstock to 8.5" by 3.5" for my cardbase.  I used the same teal cardstock to die cut the windows using the Slimline Frames and Windows Die Set.  I used the scalloped frame from the Slimline Frames and Portholes Die Set to cut a piece of Kraft cardstock.  Using the Falling Leaves Stencil, I blended Distress Oxide Inks Spiced Marmalade, Peacock Feathers, and Vintage Photo to create a gorgeous fall background on the Kraft cardstock!  

Next, I stamped out these super cute mouse images from the Autumn Mice Stamp Set, colored them with Copic markers, and cut them out using their coordinating die set. 

Autumn Mice Stamp and Die Set, Falling Leaves Stencil, Slimline Frames and Portholes Die Set, Slimline Frames and Windows Die Set by Newton's Nook Designs #newtonsnook #handmade

I cut a piece of teal cardstock for my sentiment using a die from the Slimline Frames and Windows Die Set.  I stamped the sentiment in brown pigment ink and clear heat embossed for some shine!  Here are a couple of close-ups!

Autumn Mice Stamp and Die Set, Falling Leaves Stencil, Slimline Frames and Portholes Die Set, Slimline Frames and Windows Die Set by Newton's Nook Designs #newtonsnook #handmade

Autumn Mice Stamp and Die Set, Falling Leaves Stencil, Slimline Frames and Portholes Die Set, Slimline Frames and Windows Die Set by Newton's Nook Designs #newtonsnook #handmade

With all of my pieces complete, it was time to assemble my card!  I adhered the Falling Leaves background to the teal cardbase, and used foam tape to pop up the teal windows.  I then adhered all of my images and sentiment with foam tape for some dimension!

Autumn Mice Stamp and Die Set, Falling Leaves Stencil, Slimline Frames and Portholes Die Set, Slimline Frames and Windows Die Set by Newton's Nook Designs #newtonsnook #handmade

For finishing touches on this card I added accents with a white gel pen, and glossy accents to their cute little noses!  Now it's time to get your paws inky creating a project for the Color Challenge using your Newton's Nook Designs products.  Be sure to link up to the Inky Paws Challenge!  Hope to see you there!

Monday, September 20, 2021

Happy Halloween Slimline Card

  Hi everyone!  I am up on the Pawsome Stamps blog today with a card I created combining two stamps sets, Spooky Cupcakes and Monster Party.  Both of these stamps sets are so cute and I just love that little bat! 

Monster Party Stamp and Die Set, Spooky Cupcakes Stamp and Die Set, Monster Mash Sequin Mix by Pawsome Stamps #pawsomestamps #handmade

To start this card I cut an 8.5" by 3.5" black cardbase.  I die cut another piece of black cardstock to 8" by 3" using a stitched edge die.  Next, I used a spiderweb stencil with silver glitter paste to create a sparkling background for my images!  

Monster Party Stamp and Die Set, Spooky Cupcakes Stamp and Die Set, Monster Mash Sequin Mix by Pawsome Stamps #pawsomestamps #handmade

I stamped the absolutely adorable bat from the Monster Party Stamp Set, and two of the cute cupcakes from the Spooky Cupcakes Stamp Set.  I colored them all with Copic markers, and die cut the bat using the Monster Party Die Set, and the cupcakes using the Spooky Cupcakes Die Set.  

Monster Party Stamp and Die Set, Spooky Cupcakes Stamp and Die Set, Monster Mash Sequin Mix by Pawsome Stamps #pawsomestamps #handmade

I die cut a banner out of black cardstock, and stamped and white heat embossed the "Happy Halloween" sentiment from the Spooky Cupcakes Stamp Set.  I also white heat embossed the edges of the banner as well.  

Monster Party Stamp and Die Set, Spooky Cupcakes Stamp and Die Set, Monster Mash Sequin Mix by Pawsome Stamps #pawsomestamps #handmade

I adhered my glittery spiderweb background onto the black cardbase, and used foam tape to pop up the sentiment banner and all of my colored images!

Monster Party Stamp and Die Set, Spooky Cupcakes Stamp and Die Set, Monster Mash Sequin Mix by Pawsome Stamps #pawsomestamps #handmade

For finishing touches on this card I added glitter with a glitter pen, white gel pen accents, and glossy accents to their eyes, and the bat's fangs.  I also added a few sparkling sequins from the Monster Mash Sequin Mix!  Thank you and I hope you enjoyed my card today!  Please visit the Pawsome Stamps website to pick up your Monster Party and Spooky Cupcakes Stamp Sets today!

Wednesday, September 15, 2021

Newton's Nook Designs Stamptember Exclusive!

 Hi everyone!  I am so excited to share this card with you today as it is featuring the Newton's Nook Designs/Simon Says Stamp Stamptember Exclusive collaboration stamp set, Talk Turkey!  It is available only at Simon Says Stamp!  Get them while supplies last!

Newton's Nook Designs/Simon Says Stamp Stamptember Collaboration Stamp Set Talk Turkey #handmade

Newton's Nook Designs/Simon Says Stamp Stamptember Collaboration Stamp Set Talk Turkey #handmade

Newton's Nook Designs/Simon Says Stamp Stamptember Collaboration Stamp Set Talk Turkey #handmade

To start this card I cut a 8.5" x 3.5" orange cardbase.  I used the Slimline Frames and Windows Die Set to cut orange windows as well.  I then used the scalloped frame in the Slimline Frames and Portholes Die Set to cut a piece of smooth white cardstock.  Using the Falling Leaves Stencil, I blended Distress Oxide Inks Mustard Seed, Spiced Marmalade, and Candied Apple to create a colorful fall background!

Newton's Nook Designs/Simon Says Stamp Stamptember Collaboration Stamp Set Talk Turkey #handmade

Next, I stamped out all of these adorable images from the Newton's Nook Designs/Simon Says Stamp Stamptember Exclusive collaboration stamp set, Talk Turkey!  I LOVE this stamp set!  The pup with the turkey on his head really makes me laugh!  I colored all of my images with Copic markers and fussy cut them out.

I used a banner die from the Frames and Flags Die Set to cut a dark kraft colored banner.  I gold heat embossed the sentiment and the edges of the banner as well!  Here are some close-ups!

Newton's Nook Designs/Simon Says Stamp Stamptember Collaboration Stamp Set Talk Turkey #handmade

Newton's Nook Designs/Simon Says Stamp Stamptember Collaboration Stamp Set Talk Turkey #handmade

Newton's Nook Designs/Simon Says Stamp Stamptember Collaboration Stamp Set Talk Turkey #handmade

Now it was time to assemble my card!  I adhered my Falling Leaves background to the orange cardbase, and used foam tape to pop up the orange windows.  I then used liquid glue to adhere the sentiment banner, and foam tape to adhere and give dimension to all of my images!  

Newton's Nook Designs/Simon Says Stamp Stamptember Collaboration Stamp Set Talk Turkey #handmade

For finishing touches I added accents with a white gel pen, glitter, glossy accents, and a few color coordinating sequins!  I hope you enjoyed my card today, and be sure to visit Simon Says Stamp to get your Talk Turkey Stamp Set today while supplies last!

Wednesday, August 25, 2021

Monster Party Happy Birthday!

 Hi everyone!  I am up on the Pawsome Stamps Blog today with this super cute slimline card!  I am so excited to share this card with you featuring the new Monster Party Stamp Set!  All of the monsters in this set are so darn cute and I really enjoyed coloring them in bright and cheerful colors! 

Monster Party Stamp and Die Set, Monster Mash Sequin Mix by Pawsome Stamps #pawsomestamps #handmade

I started this card by creating the background first.  I die cut a piece of smooth white cardstock and blended Distress Oxide Inks Picked Raspberry, Wilted Violet, and Mermaid Lagoon.  I then splattered some silver watercolor paint onto the background.  I used the same colors for the stenciling in the star windows. 

Monster Party Stamp and Die Set, Monster Mash Sequin Mix by Pawsome Stamps #pawsomestamps #handmade

Next, I stamped the adorable monsters and balloons from the Monster Party Stamp Set, colored them with my Copic markers, and cut them out with the coordinating die set.  

I stamped the sentiment banner and the "Happy Birthday" sentiment, both from the Monster Party Stamp Set, in black pigment ink and clear heat embossed.  I then cut the banner out with the coordinating die.  The sentiment banner in this set comes blank, so you can put any sentiment that you would like on it!  

Monster Party Stamp and Die Set, Monster Mash Sequin Mix by Pawsome Stamps #pawsomestamps #handmade

Monster Party Stamp and Die Set, Monster Mash Sequin Mix by Pawsome Stamps #pawsomestamps #handmade

With all of my pieces complete, it is time assemble the card!  I first adhered the ink blended panel over the stenciled panel.  I used foam tape to pop up and give dimension to my monsters and sentiment banner!  I put the balloons behind the cute blue monster in the center so it would look like he is holding them behind his back ready to surprise the recipient!  

Monster Party Stamp and Die Set, Monster Mash Sequin Mix by Pawsome Stamps #pawsomestamps #handmade

For finishing touches on this card I added some accents with a white gel pen, glitter to their horns and balloons, and glossy accents to the balloons, their teeth and tongues!  I also used some of the gorgeous sparkling sequins in the new Monster Mash Sequin Mix!  Head on over to the Pawsome Stamps store to check out all of the New Arrivals, and to get your Monster Party Stamp Set today!

Saturday, August 14, 2021

Coffee Besties Slimline Card

  Hi everyone!  I am up on the Pawsome Stamps blog today with this slimline card I created using the new Coffee Besties Stamp Set!  I love this stamp set so much, and have more cards to share with you using this stamp set in future posts!  

Coffee Besties Stamp and Die Set, Sparkling Mint Sequin Mix by Pawsome Stamps #pawsomestamps #handmade

I love teal and pink and knew I wanted to use those colors on this card!  I started by cutting a cardbase from textured teal cardstock, and used the same cardstock to die cut the windows.  I used a scalloped frame die to cut the pink cardstock, and used Distress Oxide Ink Kitsch Flamingo to stencil in coffee mugs for a background!

Coffee Besties Stamp and Die Set, Sparkling Mint Sequin Mix by Pawsome Stamps #pawsomestamps #handmade

I then stamped out the adorable images of the kitty and pup in coffee mugs, and the coffee beans from the Coffee Besties Stamp Set.  I colored all of my images with Copic markers and cut them out using the Coffee Besties Die Set.  

Coffee Besties Stamp and Die Set, Sparkling Mint Sequin Mix by Pawsome Stamps #pawsomestamps #handmade

Next, I adhered my pink background to the teal cardbase, and used foam tape to pop up the windows for some dimension!  I used foam squares to adhere all of my images, except for the two coffee beans hiding behind the coffee bean piles in the middle window!  

Coffee Besties Stamp and Die Set, Sparkling Mint Sequin Mix by Pawsome Stamps #pawsomestamps #handmade

With all of the coffee beans in place, I was now able to figure out exactly where I wanted to stamp the sentiment in the middle square.  

Coffee Besties Stamp and Die Set, Sparkling Mint Sequin Mix by Pawsome Stamps #pawsomestamps #handmade

To finish up this card I added white gel pen accents, glitter with a glitter pen, and glossy accents to the kitty's glasses and their cute little noses!  I also added a few sparkling sequins from the new Sparkling Mint Sequin Mix!  Head on over to the Pawsome Stamps website to check out all of their New Arrivals and pick up your Coffee Besties Stamp Set today!