Showing posts with label Cup of Tea stamp set. Show all posts

Monday, February 20, 2023

Birthday Treats are Always Calorie Free!

  Hi everyone!  I'm up on the Pawsome Stamps blog today sharing this card I created using the brand new Baked with Love Stamp Set!

Baked with Love Stamp and Die Set, Cup of Tea Stamp Set, Candy Christmas Sequin Mix by Pawsome Stamps #pawsomestamps #handmade

I started this card by die cutting a piece of white cardstock for the background.  I then randomly stamped some of the smaller images from the Baked with Love Stamp Set in light gray onto the background.

I stamped out the apron, then used one of the small floral images from the Cup of Tea Stamp Set to create a floral pattern.  I colored the image with copic markers, and cut it out using the Baked with Love Die Set.

Baked with Love Stamp and Die Set, Cup of Tea Stamp Set, Candy Christmas Sequin Mix by Pawsome Stamps #pawsomestamps #handmade

Next, I stamped the sentiment, which is from the Baked with Love Stamp Set, on teal cardstock and white heat embossed.  I cut the sentiment out using the coordinating die set.  

I assembled my card using teal cardstock for the base.  I die cut a vellum oval on which I layered the apron using foam tape to pop up the image and sentiment for some dimension!

Baked with Love Stamp and Die Set, Cup of Tea Stamp Set, Candy Christmas Sequin Mix by Pawsome Stamps #pawsomestamps #handmade

For finishing touches on this card I added accents with a white gel pen, glitter, and a few sparkling sequins from the Candy Christmas Sequin Mix.  Thank you and I hope you enjoyed my card today!  Be sure to visit the Pawsome Stamps online shop to pick up your favorite new stamp sets today!

Saturday, July 9, 2022

Christmas in July - From our Home to Yours

  Hi everyone!  I am up on the Pawsome Stamps blog today with this Christmas in July card I created by combining the Cup of Tea and Tweet Birdie Stamp Sets!  

Cup of Tea Stamp and Die Set, Tweet Birdie Stamp and Die Set, Gingerbread Lane Stamp Set, Snowflake Flurries Stencil by Pawsome Stamps #pawsomestamps #handmade

To start this card I die cut a piece of smooth white cardstock with a scalloped slimline die.  I blended on Distress Oxide Inks Salty Ocean and Tumbled Glass then splattered the background with white paint.  After the paint had dried, I used the beautiful Snowflake Flurries Stencil with glitter paste to create a sparkling, snowy background!  I then die cut white glitter paper to create snowy hills!

Next, I stamped out these gorgeous images from the Cup of Tea and Tweet Birdie Stamps Sets, colored them with Copic markers, and die cut them using their coordinating die sets.  

Cup of Tea Stamp and Die Set, Tweet Birdie Stamp and Die Set, Gingerbread Lane Stamp Set, Snowflake Flurries Stencil by Pawsome Stamps #pawsomestamps #handmade

Using a fishtail banner die, I die cut a sentiment banner out of dark blue cardstock, stamped the sentiment, which is from the Gingerbread Lane Stamp Set, and white heat embossed.  

I assembled my card using dark blue cardstock for the base, and foam tape to pop up the images and sentiment banner for some dimension!  

Cup of Tea Stamp and Die Set, Tweet Birdie Stamp and Die Set, Gingerbread Lane Stamp Set, Snowflake Flurries Stencil by Pawsome Stamps #pawsomestamps #handmade

For finishing touches on this card I added accents with a white gel pen, and glitter to the leaves and birdhouse!  Thank you and I hope you enjoyed my card today!  Be sure to visit the Pawsome Stamps online shop and pick up your new favorite stamp sets today!

Thursday, March 24, 2022

Life is a Better Ride...

  Hi everyone!  I am up on the Pawsome Stamps blog today sharing a card I created using the new Spring Day Stamp and Die Set and the Clouds for Days Stencil!  I love the new stencils because they are big enough to use on slimline cards, and I was able to create a background for this 5" x 7" card as well without having to try and adjust the stencil to make it fit!   

Spring Day Stamp and Die Set, Cup of Tea Stamp and Die Set, Clouds for Days Stencil by Pawsome Stamps #pawsomestamps #handmade

To start this card I die cut a piece of smooth white cardstock and used the new Clouds for Days Stencil with Distress Oxide Inks Tumbled Glass and Salty Ocean.  I splattered some silver watercolor paint onto the background and set it aside to dry.  I die cut two layers of grass and blended on Twisted Citron and Mowed Lawn.  

Next, I stamped out these adorable images from the new Spring Days Stamp Set, colored them with Copic markers, and cut them out using the coordinating die set.  I also stamped, colored, and die cut the flowers from the Cup of Tea Stamp Set.  

Spring Day Stamp and Die Set, Cup of Tea Stamp and Die Set, Clouds for Days Stencil by Pawsome Stamps #pawsomestamps #handmade

I stamped the sentiment directly onto my background in black pigment ink and clear heat embossed for some shine!  

I assembled my card adhering the background to a light blue A7 cardbase, and popping up the images with foam tape for some dimension!

Spring Day Stamp and Die Set, Cup of Tea Stamp and Die Set, Clouds for Days Stencil by Pawsome Stamps #pawsomestamps #handmade

For finishing touches on this card I added accents with a white gel pen, glitter to the balloons, and glossy accents to the bunny's nose!  I hope you enjoyed my card today!  Head on over to the Pawsome Stamps online shop to pick up your favorite sets from the New Release today!

Tuesday, January 4, 2022

Cup of Tea Holiday Card

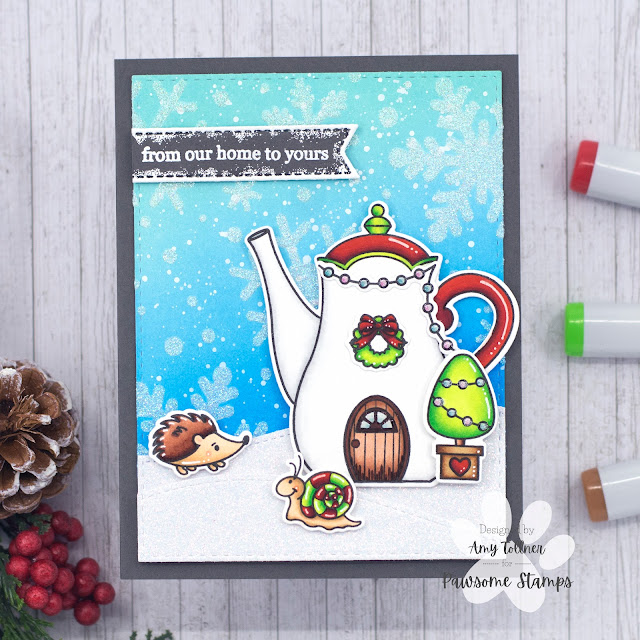
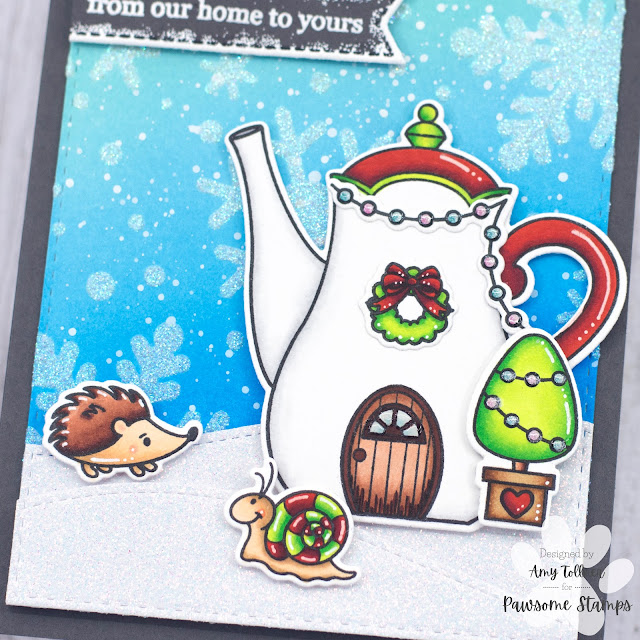
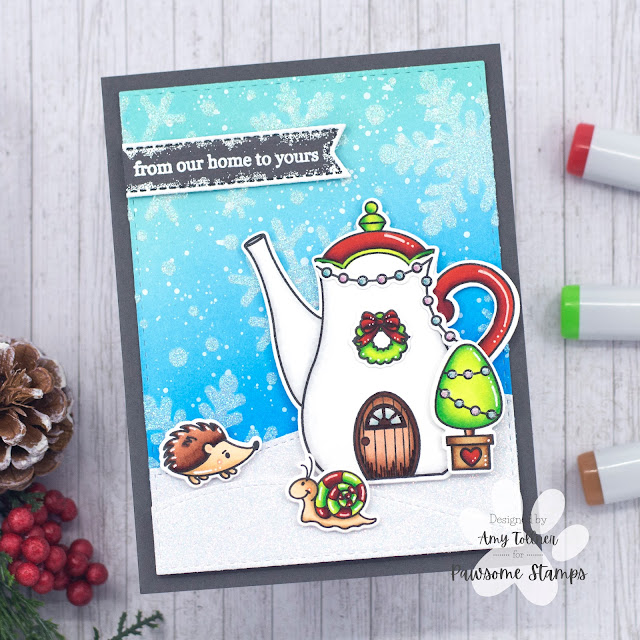
  Hi everyone!  I am up on the Pawsome Stamps blog today sharing this holiday card I created using the Cup of Tea Stamp Set!

Cup of Tea Stamp and Die Set, Gingerbread Land Stamp and Die Set, Snowflake Flurries Stencil by Pawsome Stamps #pawsomestamps #handmade

To start this card I cut a piece of smooth white cardstock on which I blended Distress Oxide Inks Salvaged Patina, Tumbled Glass, and Salty Ocean.  I then splattered my ink blended panel with white paint, and used the gorgeous Snowflake Flurries Stencil with glitter paste to create a snowy winter background!

I then stamped out one of the teapots, avoiding inking up the window, and the super cute snail and hedgehog from the Cup of Tea Stamp Set.  I stamped the wreath, tree, and string of light from the Gingerbread Lane Stamp Set.  I colored all of the images with Copic markers, and cut them out with their coordinating dies.  

Cup of Tea Stamp and Die Set, Gingerbread Land Stamp and Die Set, Snowflake Flurries Stencil by Pawsome Stamps #pawsomestamps #handmade

I decided on dark gray for a cardbase, so I die cut a dark gray banner for the sentiment, which is from the Gingerbread Lane Stamp Set.  I white heat embossed the sentiment and the edges of the banner as well!

I assembled my card adhering my background to the cardbase, and snowy hills to the background.  I then used foam tape to pop up all of my images and the sentiment banner.

Cup of Tea Stamp and Die Set, Gingerbread Land Stamp and Die Set, Snowflake Flurries Stencil by Pawsome Stamps #pawsomestamps #handmade

For finishing touches I added accents with a white gel pen, glitter, and glossy accents.  Thank you and I hope you enjoyed my card today!  Stop by the Pawsome Stamps shop to pick up your new Stamp Sets and Stencils today!

Monday, July 5, 2021

Your my Cup of Tea Slimline Card

 Hi everyone!  I'm over on the Pawsome Stamps Blog today for my first blog post!  I am so excited and grateful to be on their wonderful team!  I love the Cup of Tea stamp set!  It is so versatile, and the hedgehog and snail are just too cute!!

Cup of Tea stamp set by Pawsome Stamps #pawsomestamps

I started this card by die cutting the slimline panel and grass from smooth white cardstock.  I ink blended the grass, splattering it with water and watercolor paint, and I used a clouds stencil to ink blend the sky.  

Next, I stamped out all of these wonderful images from the Cup of Tea stamp set!  I used one of the small flower images to randomly stamp around the teapot and create a floral design!  I colored all of the images with my Copic markers and fussy cut them out.  I then used a white gel pen to go over the parts of the stamped flowers that were outside the edge of the teapot.  The white gel pen works great for that, and I was so pleased with the way the teapot came out!  I used a combination of liquid glue and foam tape to adhere the grass, and all of my images!

Cup of Tea stamp set by Pawsome Stamps #pawsomestamps

For the sentiment, I die cut a black cardstock banner, and silver heat embossed the sentiment, and the edges of the banner as well.  I adhered the sentiment piece to my card with thin foam tape.  For some reason, sometimes the hardest part of making a card for me is deciding on a color for the cardbase!  For this card, I chose a lighter blue textured cardstock, and adhered my completed card panel to my cardbase!  

Cup of Tea stamp set by Pawsome Stamps #pawsomestamps

For finishing touches on this card I added white gel pen accents and glitter to the flowers for some extra sparkle!  Thank you and I hope you enjoyed my card today!  

Don't forget to stop by the Pawsome Stamps shop today to save 20% off your entire order!!  

Pawsome Stamps 4th of July Sale #pawsomestamps