Monday, August 30, 2021

Inky Paws Challenge #156 - Sketch Challenge

 Hi everyone!  A new Inky Paws Challenge starts today!  This is Inky Paws Challenge #156 - Sketch Challenge.  You have until Friday, September 10th to get your entries in and have a chance to win a $20 store credit to Newton's Nook Designs online shop!  Can you believe it's almost September already?!

Newton's Nook Designs Inky Paws Challenge - Sketch Challenge

Peony Blooms Stamp and Die Set by Newton's Nook Designs #newtonsnook #handmade

I started this card by stamping these absolutely gorgeous flowers from the Peony Blooms Stamp Set onto smooth white cardstock and gold heat embossed.  I used my Zig Clean Color Real Brush Markers to color the images.  In the past I have used a waterbrush pen with my Zigs, but this time I used a paintbrush dipped in water and I love the way it came out!  I feel like I had more control over the amount of water I used on the image.  After my flowers were dry, I cut them out using the Peony Blooms Die Set.

Peony Blooms Stamp and Die Set by Newton's Nook Designs #newtonsnook #handmade

Next, I die cut a piece of cream cardstock with gold foil polka dots to 5" x 7" for my cardbase.  I then die cut a piece of white cardstock, and a piece of gold foil striped cardstock.  I cut the striped cardstock down, and adhered it to the bottom of the white cardstock.  I added gold ribbon across where the two pieces of cardstock meet, and a gold bow.  I then stamped the sentiment from the Peony Blooms Stamp Set and gold heat embossed.  

Peony Blooms Stamp and Die Set by Newton's Nook Designs #newtonsnook #handmade

I used foam adhesive on the back of my smaller panel to pop it up for dimension and adhere it to the cardbase.  I then used foam squares to adhere my flowers to the card.  I did color an extra bud and leaf, which I used thin foam squares to adhere, and tucked them in underneath the larger flower image.  

Zig colors used on Flowers:
  • Pink Flamingo
  • Centers - Yellow, Light Brown
Leaves:
  • Yellow Green and Light Green
  • Yellow Green and Mid Green
Peony Blooms Stamp and Die Set by Newton's Nook Designs #newtonsnook #handmade

For finishing touches on this card I added a few sparkling sequins!  Now it's time to get your paws inky creating a project for the Sketch Challenge using your Newton's Nook Designs products.  Be sure to link up to the Inky Paws Challenge!  Hope to see you there!

Wednesday, August 25, 2021

Monster Party Happy Birthday!

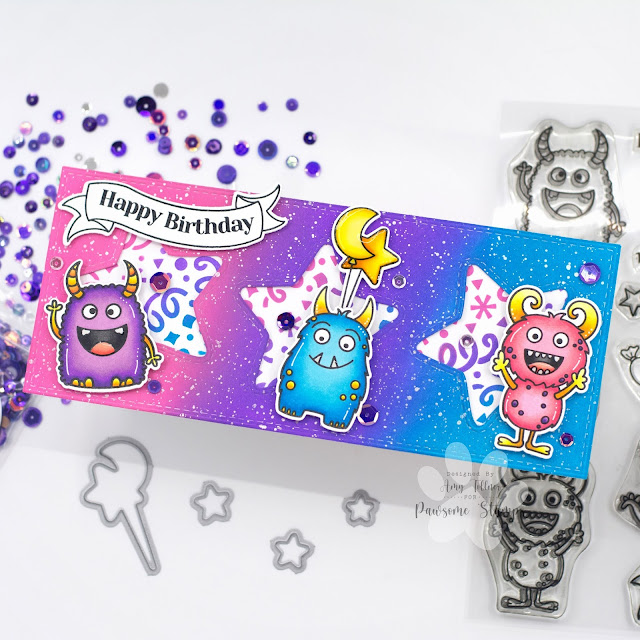
 Hi everyone!  I am up on the Pawsome Stamps Blog today with this super cute slimline card!  I am so excited to share this card with you featuring the new Monster Party Stamp Set!  All of the monsters in this set are so darn cute and I really enjoyed coloring them in bright and cheerful colors! 

Monster Party Stamp and Die Set, Monster Mash Sequin Mix by Pawsome Stamps #pawsomestamps #handmade

I started this card by creating the background first.  I die cut a piece of smooth white cardstock and blended Distress Oxide Inks Picked Raspberry, Wilted Violet, and Mermaid Lagoon.  I then splattered some silver watercolor paint onto the background.  I used the same colors for the stenciling in the star windows. 

Monster Party Stamp and Die Set, Monster Mash Sequin Mix by Pawsome Stamps #pawsomestamps #handmade

Next, I stamped the adorable monsters and balloons from the Monster Party Stamp Set, colored them with my Copic markers, and cut them out with the coordinating die set.  

I stamped the sentiment banner and the "Happy Birthday" sentiment, both from the Monster Party Stamp Set, in black pigment ink and clear heat embossed.  I then cut the banner out with the coordinating die.  The sentiment banner in this set comes blank, so you can put any sentiment that you would like on it!  

Monster Party Stamp and Die Set, Monster Mash Sequin Mix by Pawsome Stamps #pawsomestamps #handmade

Monster Party Stamp and Die Set, Monster Mash Sequin Mix by Pawsome Stamps #pawsomestamps #handmade

With all of my pieces complete, it is time assemble the card!  I first adhered the ink blended panel over the stenciled panel.  I used foam tape to pop up and give dimension to my monsters and sentiment banner!  I put the balloons behind the cute blue monster in the center so it would look like he is holding them behind his back ready to surprise the recipient!  

Monster Party Stamp and Die Set, Monster Mash Sequin Mix by Pawsome Stamps #pawsomestamps #handmade

For finishing touches on this card I added some accents with a white gel pen, glitter to their horns and balloons, and glossy accents to the balloons, their teeth and tongues!  I also used some of the gorgeous sparkling sequins in the new Monster Mash Sequin Mix!  Head on over to the Pawsome Stamps store to check out all of the New Arrivals, and to get your Monster Party Stamp Set today!

Monday, August 23, 2021

Inky Paws Challenge #155 - Color Challenge Reminder

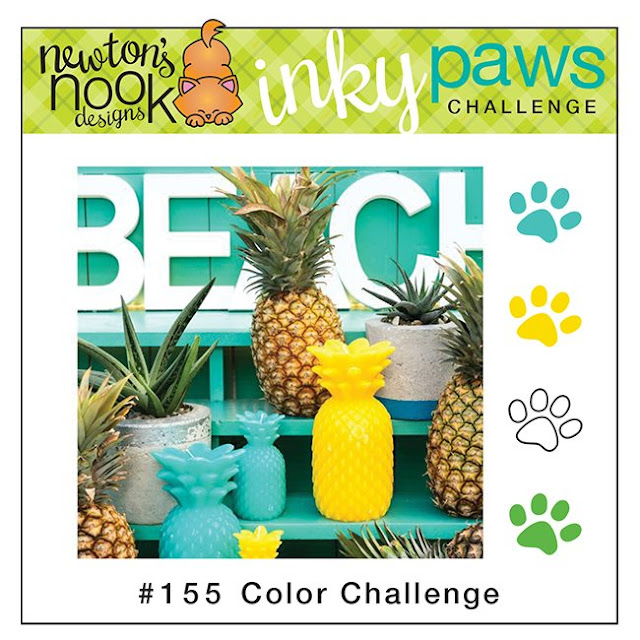
 Hi everyone!  This is an Inky Paws Challenge reminder post!  It is a Color Challenge, and the colors are Teal, Yellow, White and Green.  You have until Friday, August 27th to get your entries in and have a chance to win a $20 store credit to Newton's Nook Designs online shop!  For this card I was definitely inspired by the pineapples and tropical feel of this picture!

Newton's Nook Designs Inky Paws Challenge - Color Challenge
Tropical Fringe Stamp Set, Frames Squared Die Set by Newton's Nook Designs #newtonsnook #handmade

I started by stamping this gorgeous image from the Tropical Fringe Stamp Set onto Copic friendly white paper.  I colored it with my Copics, and cut it out using the scalloped frame die from the Frames Squared Die Set

Next, I stamped my sentiment in teal ink to match!  I then used the largest die in the Frames Squared Die Set to cut a teal cardbase.  I used a piece of foam adhesive to adhere the Tropical Fringe piece to the cardbase, and pop it up for some dimension!  

Tropical Fringe Stamp Set, Frames Squared Die Set by Newton's Nook Designs #newtonsnook #handmade

Copic colors used for Teal:
  • B00, BG53, BG45
Yellow:
  • Y11, Y13, Y19
  • Y000, Y02, Y08
  • Y04, Y08
Green:
  • YG01, YG06, YG09
  • YG01, YG03, YG17
  • YG21, YG23, YG25, YG45
Tropical Fringe Stamp Set, Frames Squared Die Set by Newton's Nook Designs #newtonsnook #handmade

To finish up this card I added white gel pen accents, glitter with a glitter pen, and a few sparkling sequins!  Now it's time to get your paws inky creating a project for the Color Challenge using your Newton's Nook Designs products.  Be sure to link up to the Inky Paws Challenge!  Hope to see you there!

Monday, August 16, 2021

Inky Paws Challenge #155 - Color Challenge

 Hi everybody!  A new Inky Paws Challenge starts today!  It is a Color Challenge.  The colors are Teal, Yellow, White, and Green.  You have until Friday, August 27th to get your entries in and have a chance to win a $20 store credit to Newton's Nook Designs online shop!  Don't you just love this color combo?

Newton's Nook Designs Inky Paws Challenge - Color Challenge

Aloha Newton Stamp and Die Set, Tropical Leaves Stencil, Frames and Flags Die Set, Circle Frames Die Set by Newton's Nook Designs #newtonsnook #handmade

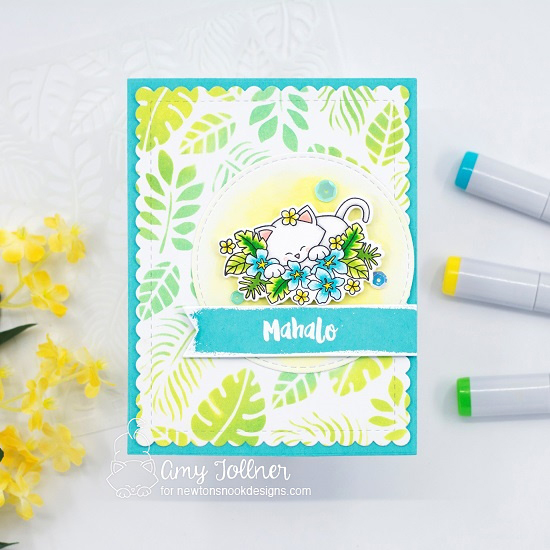
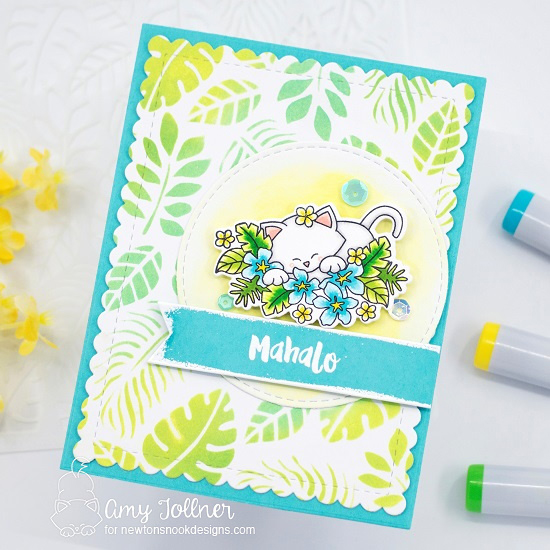
To start this card I cut a teal A2 size cardbase.  Using the scalloped frame die from the Frames and Flags Die Set I cut a piece of smooth white cardstock on which I used the Tropical Leaves Stencil with Distress Oxide Inks Twisted Citron, Mowed Lawn, and Salvaged Patina.

I used the largest smooth stitched circle die in the Circles Frames Die Set to cut a piece of smooth white cardstock on which I blended Twisted Citron and Squeezed Lemonade Distress Oxide Inks. 

Next, I stamped out this adorable Newton image from the Aloha Newton Stamp Set, colored him with Copic markers, and cut him out with the coordinating die set 

Aloha Newton Stamp and Die Set, Tropical Leaves Stencil, Frames and Flags Die Set, Circle Frames Die Set by Newton's Nook Designs #newtonsnook #handmade

I used a banner die from the Frames and Flags Die Set to cut a piece of teal cardstock on which I white heat embossed the sentiment and the edges of the banner.  

With all my pieces complete, I assembled my card.  I adhered my leafy background to the teal cardbase, and the stitched circle to the background.  I then used thin foam tape to adhere the sentiment banner, and foam squares to pop up Newton for some dimension!  

Aloha Newton Stamp and Die Set, Tropical Leaves Stencil, Frames and Flags Die Set, Circle Frames Die Set by Newton's Nook Designs #newtonsnook #handmade

Copic Colors used for Newton:
  • T0, T1, T2
  • Ears - R01, R11, R20
  • Cheeks and Nose - R11
Teal:
  • B00, BG53, BG45
Yellow:
  • Y000, Y02, Y06, Y08
Green:
  • YG01, YG03, YG09
  • YG01, YG03, YG17
  • YG21, YG23, YG25
Aloha Newton Stamp and Die Set, Tropical Leaves Stencil, Frames and Flags Die Set, Circle Frames Die Set by Newton's Nook Designs #newtonsnook #handmade

For finishing touches on this card I added accents with a white gel pen, glitter to the little yellow flowers, a few sparkling sequins, and glossy accents on Newton's nose!  Now it's time to get your paws inky creating a project for the Color Challenge using your Newton's Nook Designs products.  Be sure to link up to the Inky Paws Challenge!  Hope to see you there!

Saturday, August 14, 2021

Coffee Besties Slimline Card

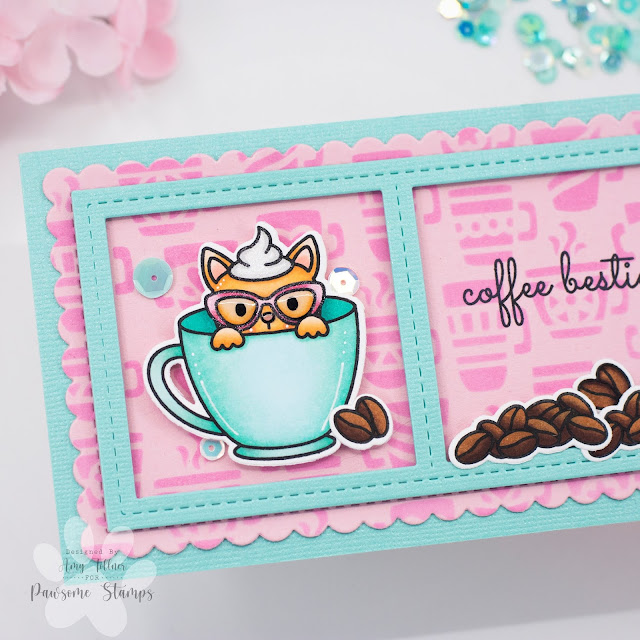
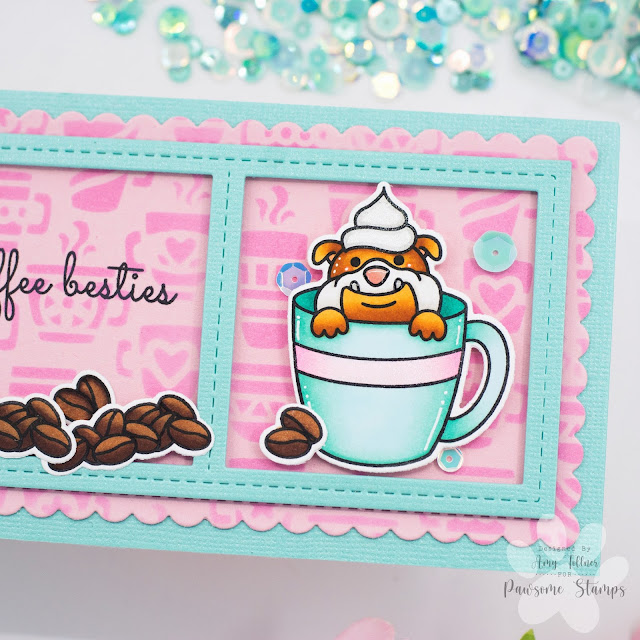
  Hi everyone!  I am up on the Pawsome Stamps blog today with this slimline card I created using the new Coffee Besties Stamp Set!  I love this stamp set so much, and have more cards to share with you using this stamp set in future posts!  

Coffee Besties Stamp and Die Set, Sparkling Mint Sequin Mix by Pawsome Stamps #pawsomestamps #handmade

I love teal and pink and knew I wanted to use those colors on this card!  I started by cutting a cardbase from textured teal cardstock, and used the same cardstock to die cut the windows.  I used a scalloped frame die to cut the pink cardstock, and used Distress Oxide Ink Kitsch Flamingo to stencil in coffee mugs for a background!

Coffee Besties Stamp and Die Set, Sparkling Mint Sequin Mix by Pawsome Stamps #pawsomestamps #handmade

I then stamped out the adorable images of the kitty and pup in coffee mugs, and the coffee beans from the Coffee Besties Stamp Set.  I colored all of my images with Copic markers and cut them out using the Coffee Besties Die Set.  

Coffee Besties Stamp and Die Set, Sparkling Mint Sequin Mix by Pawsome Stamps #pawsomestamps #handmade

Next, I adhered my pink background to the teal cardbase, and used foam tape to pop up the windows for some dimension!  I used foam squares to adhere all of my images, except for the two coffee beans hiding behind the coffee bean piles in the middle window!  

Coffee Besties Stamp and Die Set, Sparkling Mint Sequin Mix by Pawsome Stamps #pawsomestamps #handmade

With all of the coffee beans in place, I was now able to figure out exactly where I wanted to stamp the sentiment in the middle square.  

Coffee Besties Stamp and Die Set, Sparkling Mint Sequin Mix by Pawsome Stamps #pawsomestamps #handmade

To finish up this card I added white gel pen accents, glitter with a glitter pen, and glossy accents to the kitty's glasses and their cute little noses!  I also added a few sparkling sequins from the new Sparkling Mint Sequin Mix!  Head on over to the Pawsome Stamps website to check out all of their New Arrivals and pick up your Coffee Besties Stamp Set today!

Thursday, August 12, 2021

Ruff Life Mini Slimline Card and Pawsome Stamps August Release!

 Hi everyone!  Pawsome Stamps August Release is here!  Head on over to the Pawsome Stamps website to pick up all your new faves!  We are also having an Instagram Hop today so be sure to join in the fun to win some awesome prizes!  I just love the new Ruff Life Stamp Set!  It reminds me of all my fur babies!  

Ruff Life Stamp and Die Set by Pawsome Stamps #pawsomestamps #handmade

To start this card I stamped out all of the super cute images I wanted to use from the Ruff Life Stamp Set.  I colored all of them with Copic markers and cut them out with their coordinating die set.  

I cut a piece of teal cardstock to go behind my "wall" of cream colored cardstock, which I cut with a panel die.  I wanted the teal to show through the little holes created with the panel die, and I also wanted it to match the floor, which is a piece of textured teal cardstock.  I cut a thin strip of white paper to create a baseboard.  I then adhered all of my background pieces to a dark gray cardbase with liquid glue.

Ruff Life Stamp and Die Set by Pawsome Stamps #pawsomestamps #handmade

Next, I used a banner die to cut a piece of the dark gray cardstock to use for the sentiment, which I white heat embossed.

Ruff Life Stamp and Die Set by Pawsome Stamps #pawsomestamps #handmade

I adhered all of my images and the sentiment banner to my card with foam tape for dimension. For finishing touches on this card I added accents with a white gel pen, glitter, and glossy accents!

Ruff Life Stamp and Die Set by Pawsome Stamps #pawsomestamps #handmade

I hope you enjoyed my card today!  Don't forget to join in the fun of the IG Hop to win some great prizes!  Get your Ruff Life Stamp Set and coordinating die set on the Pawsome Stamps website today!

Monday, August 9, 2021

Inky Paws Challenge #154 - Use Stripes Theme Reminder

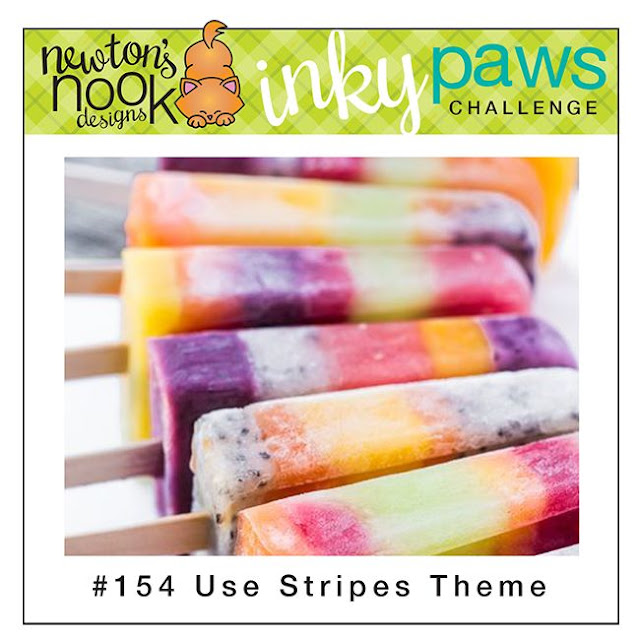
  Hi everybody!  This is an Inky Paws Challenge #154 - Use Stripes Theme reminder post!  You have until Friday, August 13th to get your entries in for a chance to win a $20 store credit to Newton's Nook Designs online shop!  The popsicles in the badge photo look so good they inspired me to use an ice cream theme for my card!

Newton's Nook Designs Inky Paws Challenge #154 - Use Stripes Theme

Inky Paws Challenge Use Stripes Theme - Summer Scoops Stamp and Die Set, Slimline Frames and Portholes Die Set by Newton's Nook Designs #newtonsnook #handmade

To start this card I cut a piece of patterned paper to 8.5" by 3.5" for my cardbase.  I used the scalloped frame die in the Slimline Frames and Portholes Die Set to cut a piece of white cardstock, and the portholes die to cut a piece of the same patterned paper I used for my cardbase.  

I stamped the ice cream image and sprinkles image two times each from the Summer Scoops Stamp Set, colored them with Copic markers, and cut them out with their coordinating dies.  

I directly adhered the white scalloped cardstock layer to the patterned paper cardbase.  I then used foam tape to adhere the portholes patterned paper.  Next, I stamped the sentiment in black pigment ink, then used foam tape to pop up the ice cream images and sprinkles. 

Inky Paws Challenge Use Stripes Theme - Summer Scoops Stamp and Die Set, Slimline Frames and Portholes Die Set by Newton's Nook Designs #newtonsnook #handmade

Inky Paws Challenge Use Stripes Theme - Summer Scoops Stamp and Die Set, Slimline Frames and Portholes Die Set by Newton's Nook Designs #newtonsnook #handmade

Copic colors used for Pink:
  • RV000, RV00, RV02
Blue:
  • BG000, BG01, BG02, BG05
Yellow:
  • Y000, Y00, Y02
Red:
  • R05, R27, R39
Purple:
  • V01, V12, V04
Inky Paws Challenge Use Stripes Theme - Summer Scoops Stamp and Die Set, Slimline Frames and Portholes Die Set by Newton's Nook Designs #newtonsnook #handmade

For finishing touches on this card I added white gel pen accents, glitter and glossy accents to the hearts and sprinkles, and a few sparkling sequins!  Now it's time to get your paws inky creating a project Using Stripes and your Newton's Nook Designs products!  Be sure to link up to the Inky Paws Challenge!  Hope to see you there!

Sunday, August 8, 2021

Rainbow Teacups Slimline Card

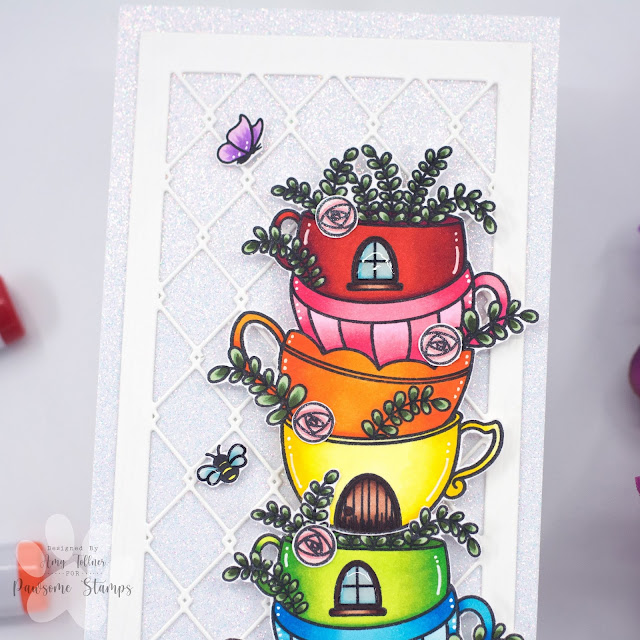
  Hi everyone!  I am over on the Pawsome Stamps blog today!  I absolutely LOVE the Cup of Tea Stamp Set!  When I saw the teacups stacked up, I thought they would make a perfect rainbow! 

Cup of Tea Stamp Set by Pawsome Stamps #pawsomestamps #handmade

I knew I wanted the teacups to stand out on this card so I went with a white glitter cardbase.  I then die cut white cardstock with a panel die and adhered it to my glitter cardbase for some texture.  

Cup of Tea Stamp Set by Pawsome Stamps #pawsomestamps #handmade

Next, I stamped out the stack of teacups from the Cup of Tea Stamp Set two times.  I also stamped out some flowers, bees, and a butterfly.  I colored all of my images with Copic markers and fussy cut them out.  I cut around some of the leaves in the green teacup so I could fit the yellow cup on top to make it look like it was always there!  

Cup of Tea Stamp Set by Pawsome Stamps #pawsomestamps #handmade

I die cut a banner out of black cardstock and white heat embossed the sentiment.  I used thin foam tape and liquid glue to adhere the sentiment banner.  I used foam squares with liquid glue to adhere the teacups, bees, and butterfly.  I like using liquid glue on foam tape when I am adhering it to glitter cardstock.  The foam tape itself doesn't always stick that well to glitter, but adding the liquid glue solves that problem!  

Cup of Tea Stamp Set by Pawsome Stamps #pawsomestamps #handmade

Cup of Tea Stamp Set by Pawsome Stamps #pawsomestamps #handmade

For finishing touches on this card I added white gel pen accents, glitter to the flowers, and glossy accents to the windows and bees' wings.  Thank you and I hope you enjoyed my card today!  Be sure to pick up your Cup of Tea Stamp Set in the Pawsome Stamps shop today!

Monday, August 2, 2021

Inky Paws Challenge #154 - Use Stripes Theme

  Hi everybody!  A new Inky Paws Challenge starts today!  You have until Friday, August 13th to get your entries in and have a chance to win a $20 store credit to Newton's Nook Designs online shop!  This is Inky Paws Challenge #154 - Use Stripes Theme.  I normally do not use stripes very often, so this challenge was a challenge for me!  It was fun creating cards outside of my normal box!

Newton's Nook Designs Inky Paws Challenge #154 - Use Stripes Theme

Inky Paws Challenge Use Stripes Theme - Fabulous Frenchies Stamp and Die Set, Serene Stripes Stencil, Framework Die Set, Fancy Edges Tag Die Set by Newton's Nook Designs #newtonsnook #handmade

To start this card I cut a piece of smooth white cardstock using the large postage stamp die from the Framework Die Set.  I used the Serene Stripes Stencil with Distress Oxide Inks Squeezed Lemonade, Dried Marigold, and Kitsch Flamingo to create my background.  

Next, I stamped out this adorable doggie image and pawprint from the Fabulous Frenchies Stamp Set, colored them with Copic markers, and cut them out with their coordinating dies.

I then used the Fancy Edges Tag Die Set to cut my tag from white cardstock on which I blended the Squeezed Lemonade and Dried Marigold Distress Oxide Inks.  I used black pigment ink to stamp the sentiment, and clear heat embossed it for some shine!

Inky Paws Challenge Use Stripes Theme - Fabulous Frenchies Stamp and Die Set, Serene Stripes Stencil, Framework Die Set, Fancy Edges Tag Die Set by Newton's Nook Designs #newtonsnook #handmade

I adhered my striped background to a pink A2 size cardbase.  I adhered the tag to my background with foam tape, and I also used foam tape to pop up the pup and pawprint for more dimension!

Inky Paws Challenge Use Stripes Theme - Fabulous Frenchies Stamp and Die Set, Serene Stripes Stencil, Framework Die Set, Fancy Edges Tag Die Set by Newton's Nook Designs #newtonsnook #handmade

Colors used for Frenchie:
  • E50, E51, E53
  • Muzzle - E31, E33, E35
  • Ears and Nose - R01, R11, R20
  • Cheeks - E93
Pink:
  • R30, R20, R22
Peach:
  • YR000, YR00, YR61
Yellow:
  • Y11, Y13, Y15
Inky Paws Challenge Use Stripes Theme - Fabulous Frenchies Stamp and Die Set, Serene Stripes Stencil, Framework Die Set, Fancy Edges Tag Die Set by Newton's Nook Designs #newtonsnook #handmade

For finishing touches on this card I added white gel pen accents, glitter to the scarf and pawprint, and glossy accents to the pawprint and the frenchie's cute little nose!  Now it's time to get your paws inky creating a project Using Stripes and your Newton's Nook Designs products!  Be sure to link up to the Inky Paws Challenge!  Hope to see you there!